
00027-docker 学习笔记-ubuntu
前言
Docker 是一个开源的应用容器引擎,让开发者可以打包他们的应用以及依赖包到一个可移植的镜像中,然后发布到任何流行的 Linux 或 Windows 操作系统的机器上,也可以实现虚拟化。容器是完全使用沙箱机制,相互之间不会有任何接口。
原教学视频是遇见狂神说的【狂神说Java】Docker最新超详细版教程通俗易懂。
原笔记可以参考:狂神说docker(最全笔记)。
操作系统:Ubuntu 20.04.4 LTS
参考文档
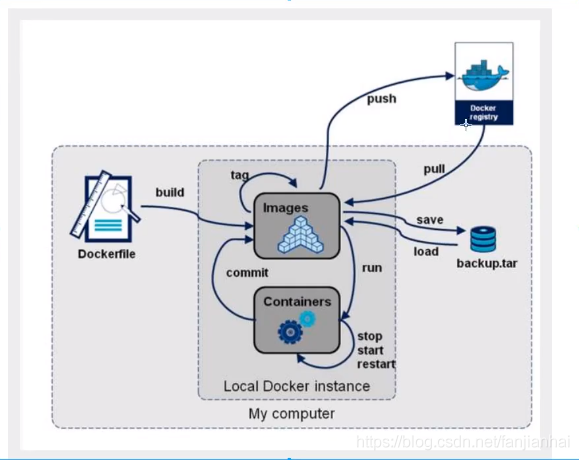
Docker 入门
Docker 为什么会出现
在 Docker 之前,一款产品需要两种配置环境(开发环境和运维上线环境)。
-
由于
开发和运维的环境(电脑操作系统、软件版本等)不同,经常导致运维人员无法成功部署产品。 -
分布式系统(如
Hadoop)需要为每一个电脑配置环境,非常麻烦。 -
由于开发人员经常使用
Windows或者MacOS进行开发,然后将产品部署到Linux上,因此经常出现无法成功部署问题。
Docker 让开发者可以打包他们的应用以及依赖包到一个可移植的镜像中,然后发布到任何流行的 Linux 或 Windows 操作系统的机器上,进而解决了上面问题。
Docker 的思想来自于集装箱!隔离机制(容器是完全使用沙箱机制,相互之间不会有任何接口。)使得 Docker 能够轻松的部署软件,并且各个软件不会相互冲突。
Docker 通过隔离机制,使得服务器可以被利用到极致。
Docker 的历史
Docker 是 PaaS 提供商 dotCloud 开源的一个基于 LXC 的高级容器引擎,源代码托管在 Github 上, 基于 go 语言并遵从 Apache2.0 协议开源。
与 Docker (容器技术)相对应是虚拟机技术(如 VMware)。
-
虚拟机技术: 在本地操作系统(如Windows)装一个VMware,通过VMware可以虚拟出来一个新的电脑(操作系统)。相当笨重! -
虚拟机技术和Docker(容器技术)都属于虚拟化技术!
VMware:Linux centos原生镜像相当于一台完整的电脑,每个都需要几个G,每次启动都需要几分钟。
docker: 镜像一般十分小巧,只有几M或者几KB,秒级启动。
Docker 是基于 Go 语言开发的!是一个开源项目。
Docker 的官网地址为:https://www.docker.com/ 。
Docker 的官方文档地址为:https://docs.docker.com/ 。
Docker Hub 的地址为:https://hub.docker.com/ 。
虚拟机技术和容器化技术对比
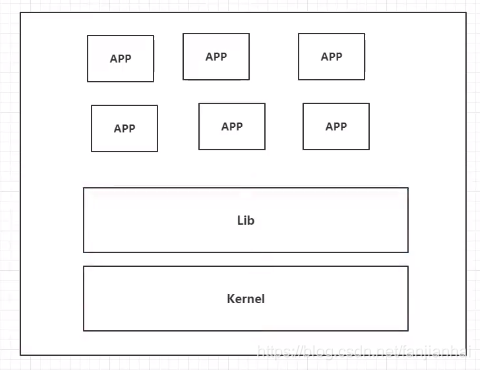
虚拟机技术的缺点
如下图,每一个虚拟机都包括操作系统内核、库文件和上层应用软件。
-
资源占用十分多。 -
冗余步骤多。 -
启动很慢。
容器化技术
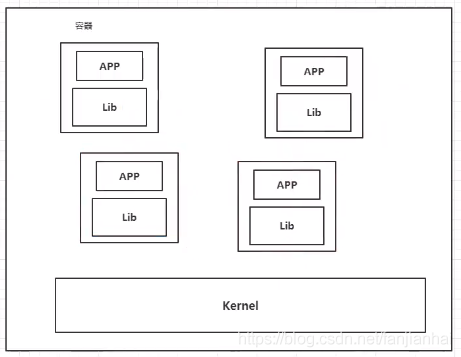
Docker 和虚拟机技术的区别:
-
传统虚拟机会首先虚拟出一个完整的操作系统和相关硬件,然后在这个系统上安装和运行软件。 -
Docker的容器是没有自己的内核的,也没有相关硬件。容器内的应用是直接运行在宿主机上的,因此十分的轻巧。 -
容器间是相互隔离的,每个容器都有一个独立的文件系统,因此各个容器互不影响。
DevOps(开发和运营维护)
-
更快速的交互和部署
-
传统开发和运营维护:大量帮助文档和安装程序。 -
Docker: 打包镜像,一键运行。
-
-
更便捷的升级和扩缩容
Docker会像搭积木一样部署应用。整个项目会被打包成一个镜像。
-
更简单的系统运维
- 开发和测试环境高度一致。
-
更高效的计算机资源利用
Docker是内核级别的虚拟化,可以在一个物理机上运行多个容器实例!服务器的性能可以被压榨到极致。
名词解释
-
镜像(image)
Docker镜像相当于模板,可以用于创建Docker容器服务。一个镜像可以创建多个Docker容器服务(我们软件或者服务是运行在容器中的)。
-
容器(container)
-
Docker通过镜像来创建一个或者多个容器,进而独立运行一个或者一组应用。 -
容器具有启动、停止和删除等基本命令!
-
可以把容器理解为一个独立的
linux系统。
-
-
仓库(repository)
- 存放镜像的地方。如
Docker Hub和阿里云镜像服务器。
- 存放镜像的地方。如
安装 docker
官方 Ubuntu 安装 Docker Engine 教程为:Install Docker Engine on Ubuntu。
为了在 Ubuntu 安装 Docker Engine,确保你满足 prerequisites,然后安装 Docker。
Prerequisites
OS requirements
为了安装 Docker Engine,你需要这些 Ubuntu 版本之一的 64 位版本:
-
Ubuntu Jammy 22.04 (LTS)
-
Ubuntu Impish 21.10
-
Ubuntu Focal 20.04 (LTS)
-
Ubuntu Bionic 18.04 (LTS)
Docker Engine 支持 x86_64 (or amd64),armhf,arm64,和 s390x 体系结构。
通过下面命令获得本机体系结构:
1 | hostnamectl |
Uninstall old versions
旧版本的 Docker 被称为 docker,docker.io 或 docker-engine。如果安装了这些,请卸载它们:
1 | sudo apt-get remove docker docker-engine docker.io containerd runc |
It’s OK if
apt-getreports that none of these packages are installed.The contents of
/var/lib/docker/, includingimages,containers,volumes, andnetworks, are preserved. If you do not need to save your existing data, and want to start witha clean installation, refer to theuninstall Docker Enginesection.
Installation methods
You can install Docker Engine in different ways, depending on your needs:
-
Most users
set up Docker’s repositoriesand install from them, for ease of installation and upgrade tasks. This is the recommended approach. -
Some users download the DEB package and
install it manuallyand manage upgrades completely manually. This is useful in situations such as installing Docker on air-gapped systems with no access to the internet. -
In testing and development environments, some users choose to use automated
convenience scriptsto install Docker.
Install using the repository
Before you install Docker Engine for the first time on a new host machine, you need to set up the Docker repository. Afterward, you can install and update Docker from the repository.
Set up the repository
- Update the
aptpackage index andinstall packagesto allowaptto use a repository over HTTPS:
1 | sudo apt-get update |
- Add Docker’s official GPG key:
1 | sudo mkdir -p /etc/apt/keyrings |
- Use the following command to set up the repository:
1 | echo \ |
Install Docker Engine
- Update the
aptpackage index, and install thelatest versionofDocker Engine,containerd, andDocker Compose:
1 | sudo apt-get update |
- Verify that Docker Engine is installed correctly by running the
hello-worldimage.
1 | (base) lyfubuntu@lyfubuntu:~$ sudo docker run hello-world |
This command downloads a test image and runs it in a container. When the container runs, it prints a message and exits.
Docker Engineis installed and running. Thedockergroup is created but no users are added to it. You need to usesudoto run Docker commands.
Uninstall Docker Engine
- Uninstall the
Docker Engine,CLI,Containerd, andDocker Composepackages:
1 | sudo apt-get purge docker-ce docker-ce-cli containerd.io docker-compose-plugin |
Images,containers,volumes, orcustomized configuration fileson your host are not automatically removed. To delete allimages,containers, andvolumes:
1 | sudo rm -rf /var/lib/docker |
You must delete any edited configuration files manually.
底层原理
hello-world image
1 | sudo docker run hello-world |
输出上面这段提示以后,hello-world 就会停止运行,容器自动终止。
1 | 由于本地没有 hello-world 镜像,因此需要下载 hello-world 镜像。通过镜像创建一个容器,并运行。 |
run 命令背后的机制
1 | start; |
底层原理
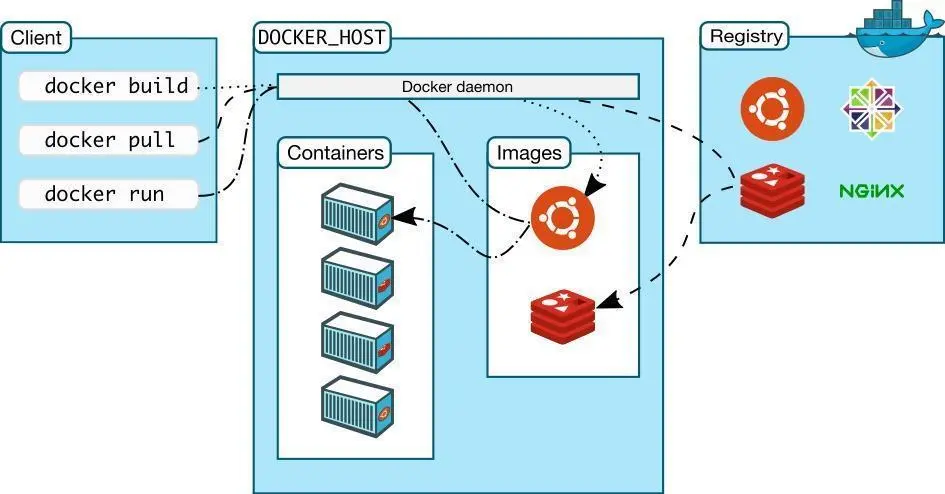
Docker Engine 是一个客户端-服务器应用程序,具有以下主要组件:
-
一个
服务器,是一个长期运行的程序,被称为守护进程。 -
一个
REST API,该API可以指定某些程序(如bash)与守护进程交互,进而向守护进程发出指令。
Docker 是一个 Client Server 结构的系统。Docker 守护进程运行在宿主机上,客户端可以通过 Socket 访问守护进程,进而管理运行在宿主机上的容器(一个运行时环境)。
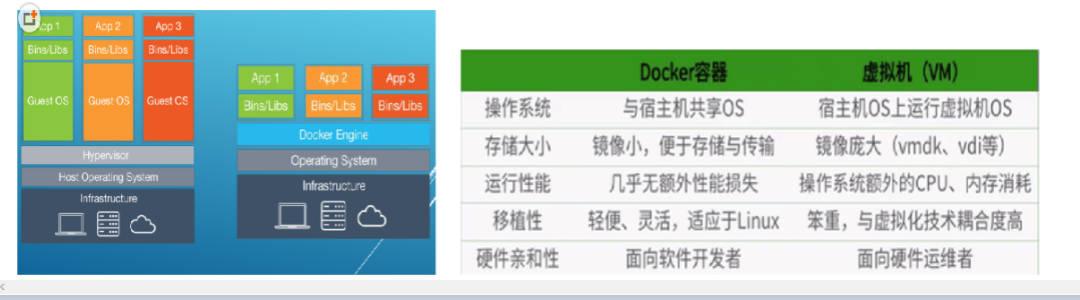
为什么 Docker 比 VMware 快
-
docker有着比虚拟机更少的抽象层,docker不需要Hypervisor实现硬件虚拟化,docker容器上的程序直接使用宿主机上的硬件资源。因此,docker更能充分利用宿主机上的CPU、内存等资源。 -
docker利用的是宿主机的内核,不需要Guest OS。因此,当新建一个容器时,docker不需要和虚拟机一样重新加载一个操作系统内核,因而只需几秒钟;虚拟机需要加载Guest OS,需要几分钟。
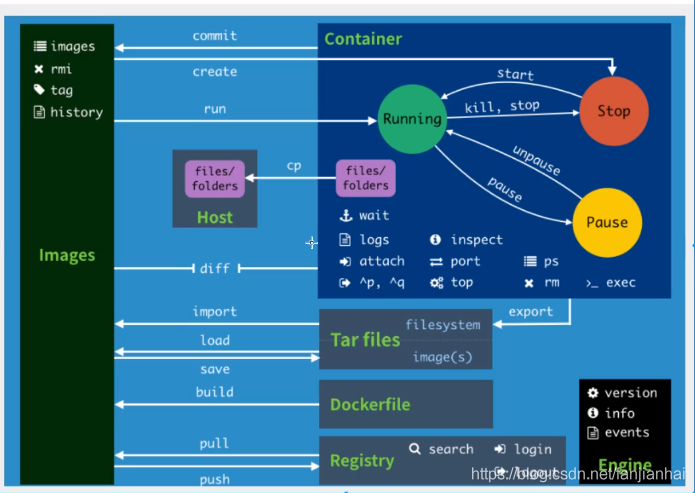
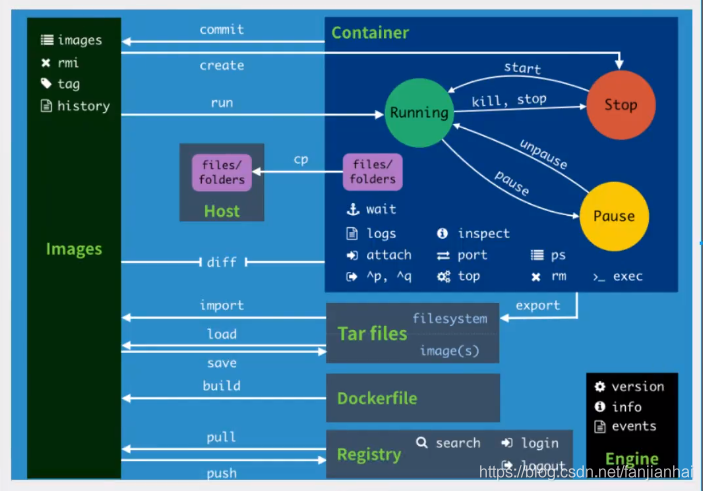
Docker 基本命令
Docker 的常用命令
官方的命令帮助文档为:https://docs.docker.com/engine/reference/commandline/docker/ 。
- 帮助命令
1 | docker version # docker 版本信息 |
1 | (base) lyfubuntu@lyfubuntu:~$ docker version |
- 镜像命令
docker images:查看所有本地主机上的镜像。
1 | (base) lyfubuntu@lyfubuntu:~$ docker images |
1 | REPOSITORY # 镜像的仓库 |
docker search:查找镜像。
1 | (base) lyfubuntu@lyfubuntu:~$ docker search --help |
1 | --filter=STARS=3000 # 搜素出来的镜像是 STARS 大于 3000 的 |
docker pull:下拉镜像。
1 | (base) lyfubuntu@lyfubuntu:~$ docker pull --help |
1 | 下载镜像,docker pull 镜像名[:tag] |
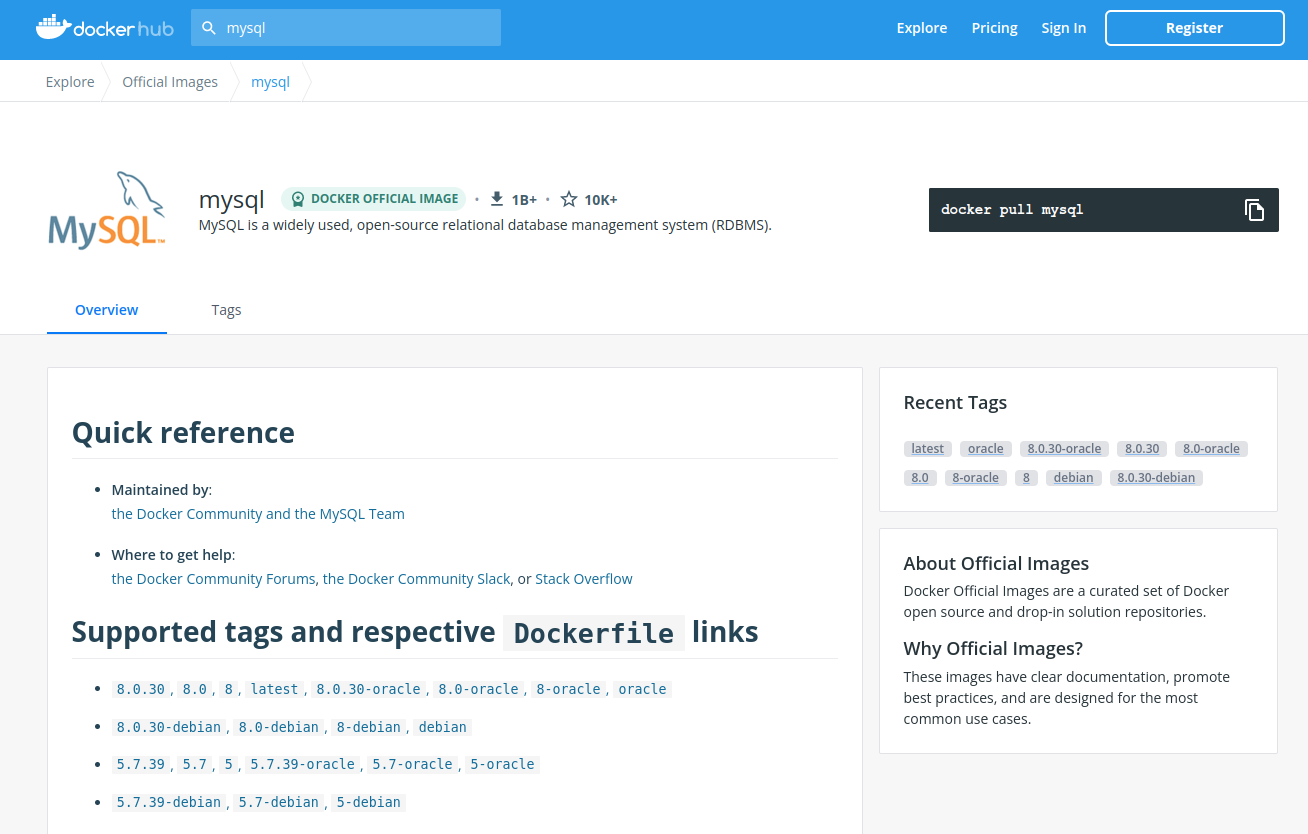
可以在 Docker Hub 中搜索 mysql 查看支持的版本:https://hub.docker.com/_/mysql 。
docker rmi:删除镜像。
1 | (base) lyfubuntu@lyfubuntu:~$ docker rmi --help |
1 | 删除指定镜像:docker rmi -f IMAGE ID |
- 容器命令
说明:需要镜像才可以创建容器,下载一个 centos 镜像来学习容器命令:
1 | docker pull centos |
docker run:新建容器并启动。
1 | docker run [可选参数] image |
1 | (base) lyfubuntu@lyfubuntu:~$ docker images |
docker ps:列出所有运行的容器。
1 | docker ps 命令 |
1 | (base) lyfubuntu@lyfubuntu:~$ docker ps --help |
退出容器。
1 | 直接退出容器并关闭容器 |
1 | (base) lyfubuntu@lyfubuntu:~$ docker images |
docker rm:删除容器。
1 | 删除指定容器 |
1 | (base) lyfubuntu@lyfubuntu:~$ docker rm --help |
启动和停止容器。
1 | docker start 容器id # 启动容器 |
1 | (base) lyfubuntu@lyfubuntu:~$ docker images |
- 常用的其他命令
后台启动容器
1 | 后台启动容器 |
1 | (base) lyfubuntu@lyfubuntu:~$ docker images |
查看日志
1 | 产看日志 |
1 | (base) lyfubuntu@lyfubuntu:~$ docker logs --help |
查看容器中进程信息
1 | 查看容器中的进程信息 |
1 | (base) lyfubuntu@lyfubuntu:~$ docker top --help |
查看 Docker objects 的元数据
1 | (base) lyfubuntu@lyfubuntu:~$ docker inspect --help |
进入当前正在运行的容器
1 | 当容器使用后台方式运行时,我们经常需要进入容器,修改一些配置 |
1 | (base) lyfubuntu@lyfubuntu:~$ docker exec --help |
从容器中拷贝文件到主机
Dokcer 中的 centos 的镜像不能通过 yum 安装软件,主要原因是 CentOS 已经停止更新和维护。如果需要更新 CentOS,需要将镜像从 mirror.centos.org 更改为 vault.centos.org。详情可以参考【已解决】Error: Failed to download metadata for repo ‘appstream‘: Cannot prepare internal mirrorlist。
- 进入到
yum的repos目录。
1 | cd /etc/yum.repos.d/ |
- 修改
centos文件内容。
1 | sed -i 's/mirrorlist/#mirrorlist/g' /etc/yum.repos.d/CentOS-* |
- 生成
缓存更新(第一次更新,速度稍微有点慢,耐心等待两分钟左右)。
1 | yum makecache |
- 运行
yum update并重新安装vim。
1 | yum update -y |
1 | (base) lyfubuntu@lyfubuntu:~/my_computer_language/docker$ docker images |
1 | 从容器中拷贝文件到主机 |
1 | (base) lyfubuntu@lyfubuntu:~/my_computer_language/docker$ docker images |
Docker 部署软件实战
Docker 安装 Nginx
1 | 搜索 nginx 镜像(docker search nginx);最好去 docker hub 搜索,因为可以看到帮助文档 |
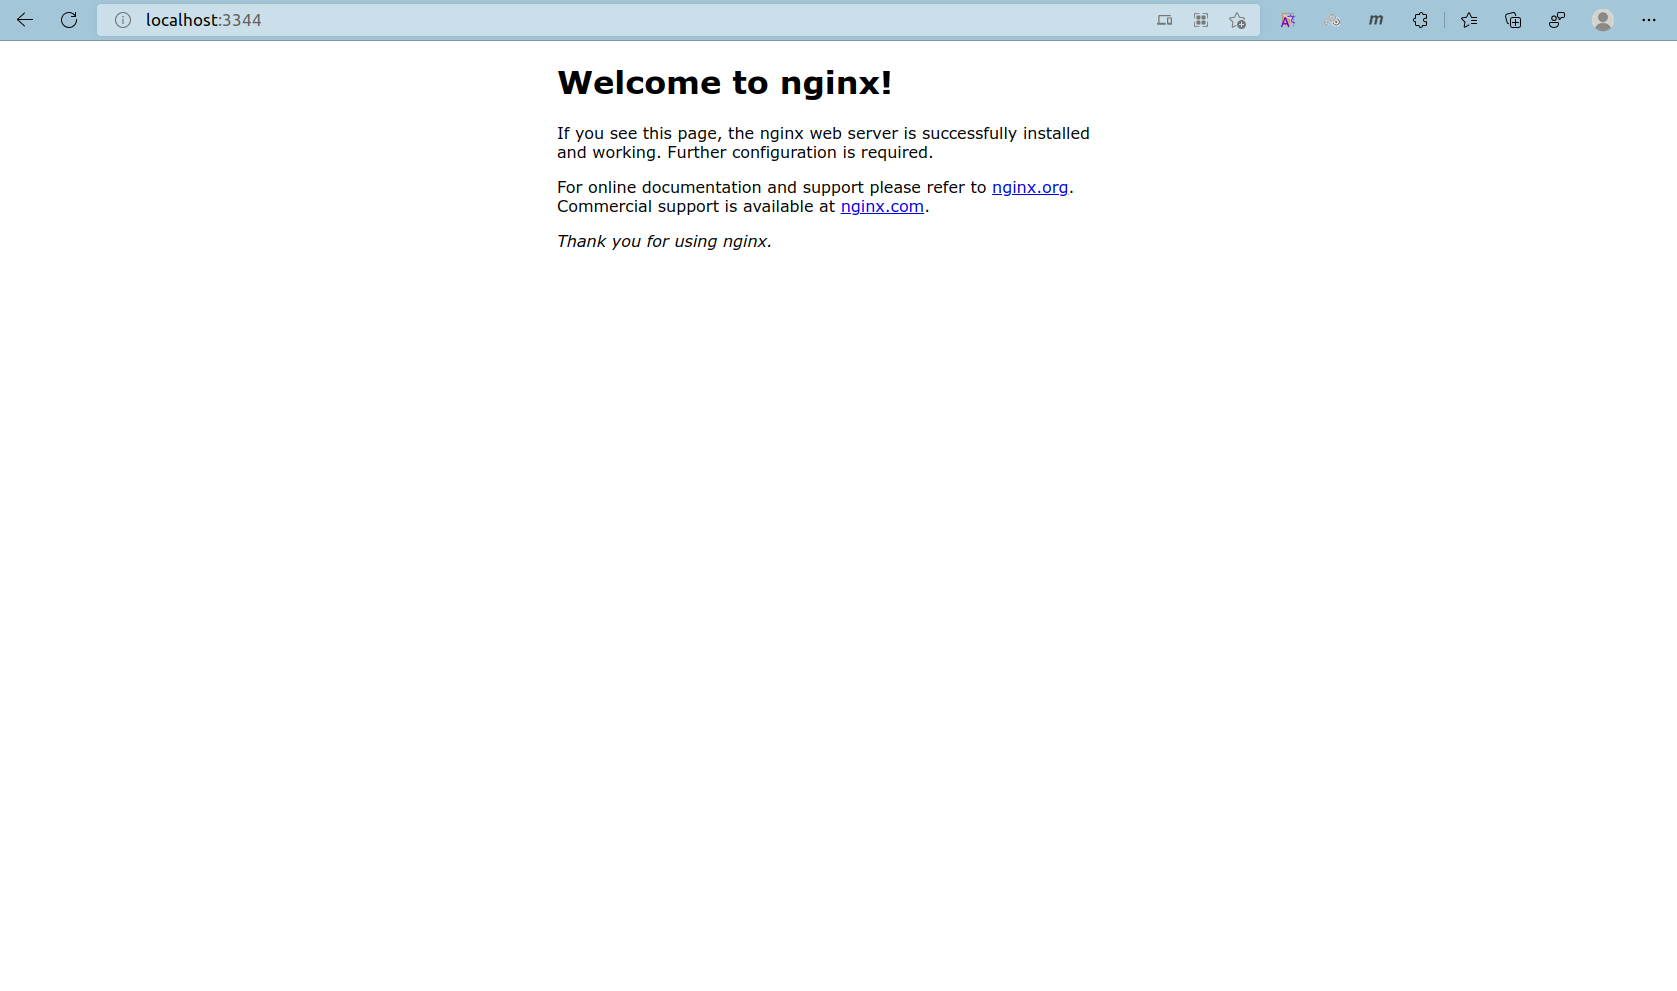
docker hub 搜索 nginx 获得的官方 nginx 主页:https://hub.docker.com/_/nginx 。
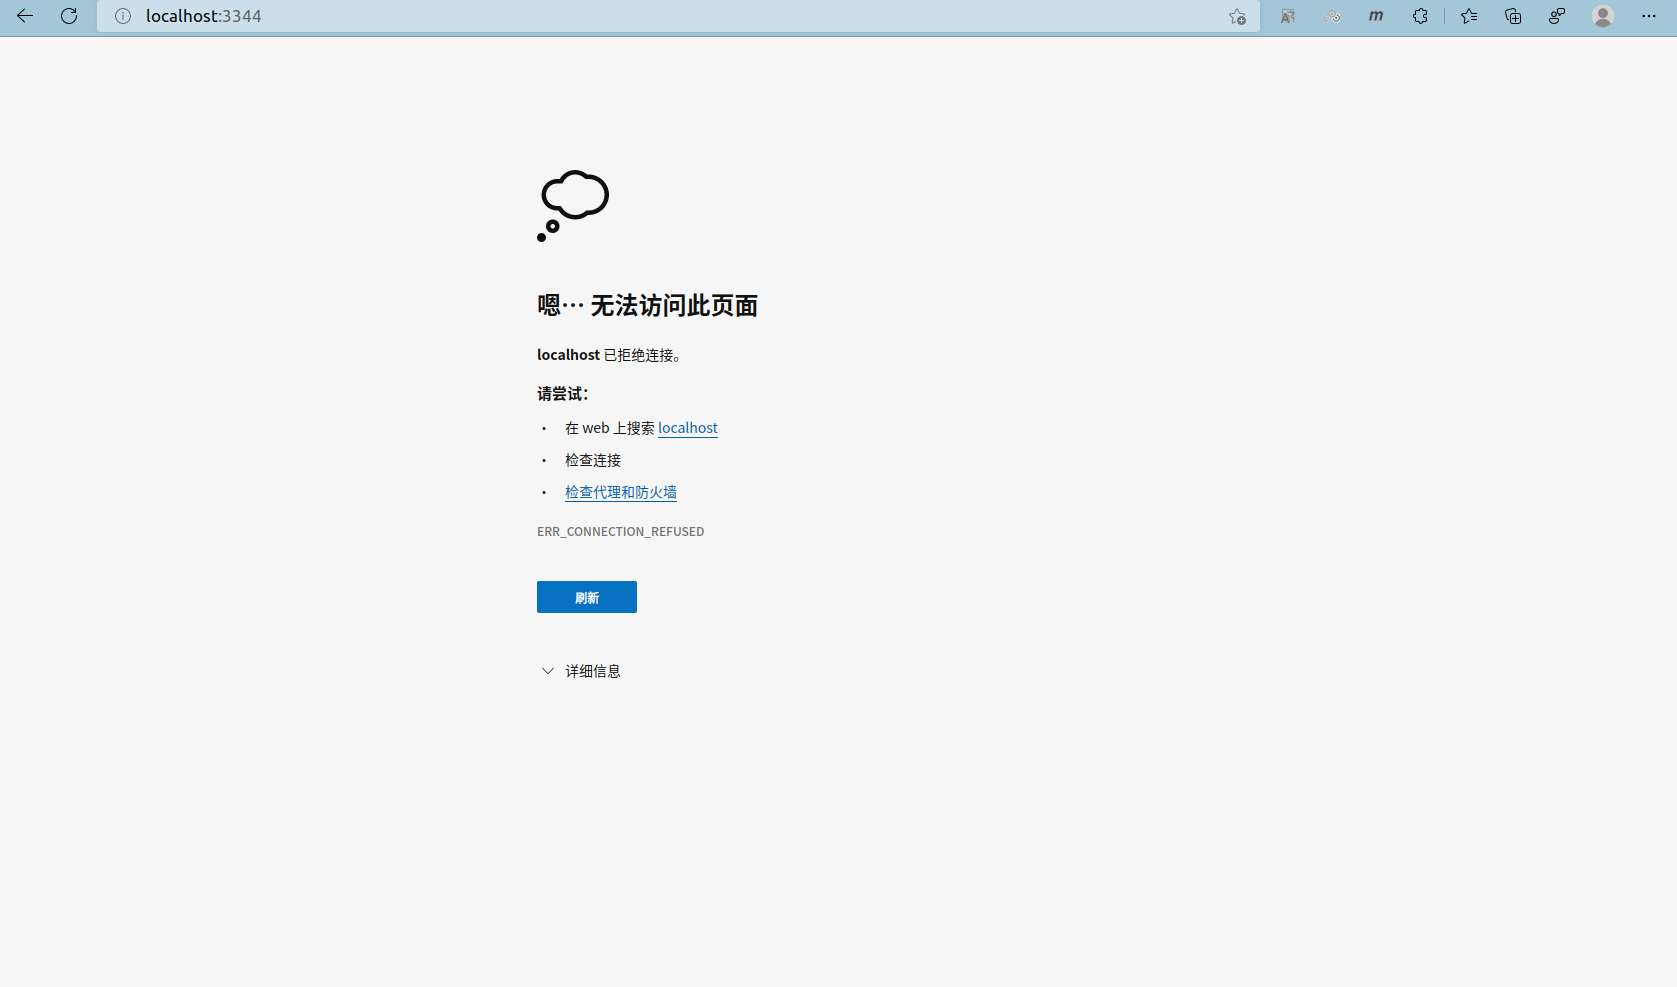
http://localhost:3344/ 的页面如下:
1 | (base) lyfubuntu@lyfubuntu:~/my_computer_language/docker$ docker ps |
Docker 安装 Tomcat
docker hub 中 tomcat 的主页:https://hub.docker.com/_/tomcat 。
1 | 官方的使用 |
1 | (base) lyfubuntu@lyfubuntu:~/my_computer_language/docker$ docker run --help |
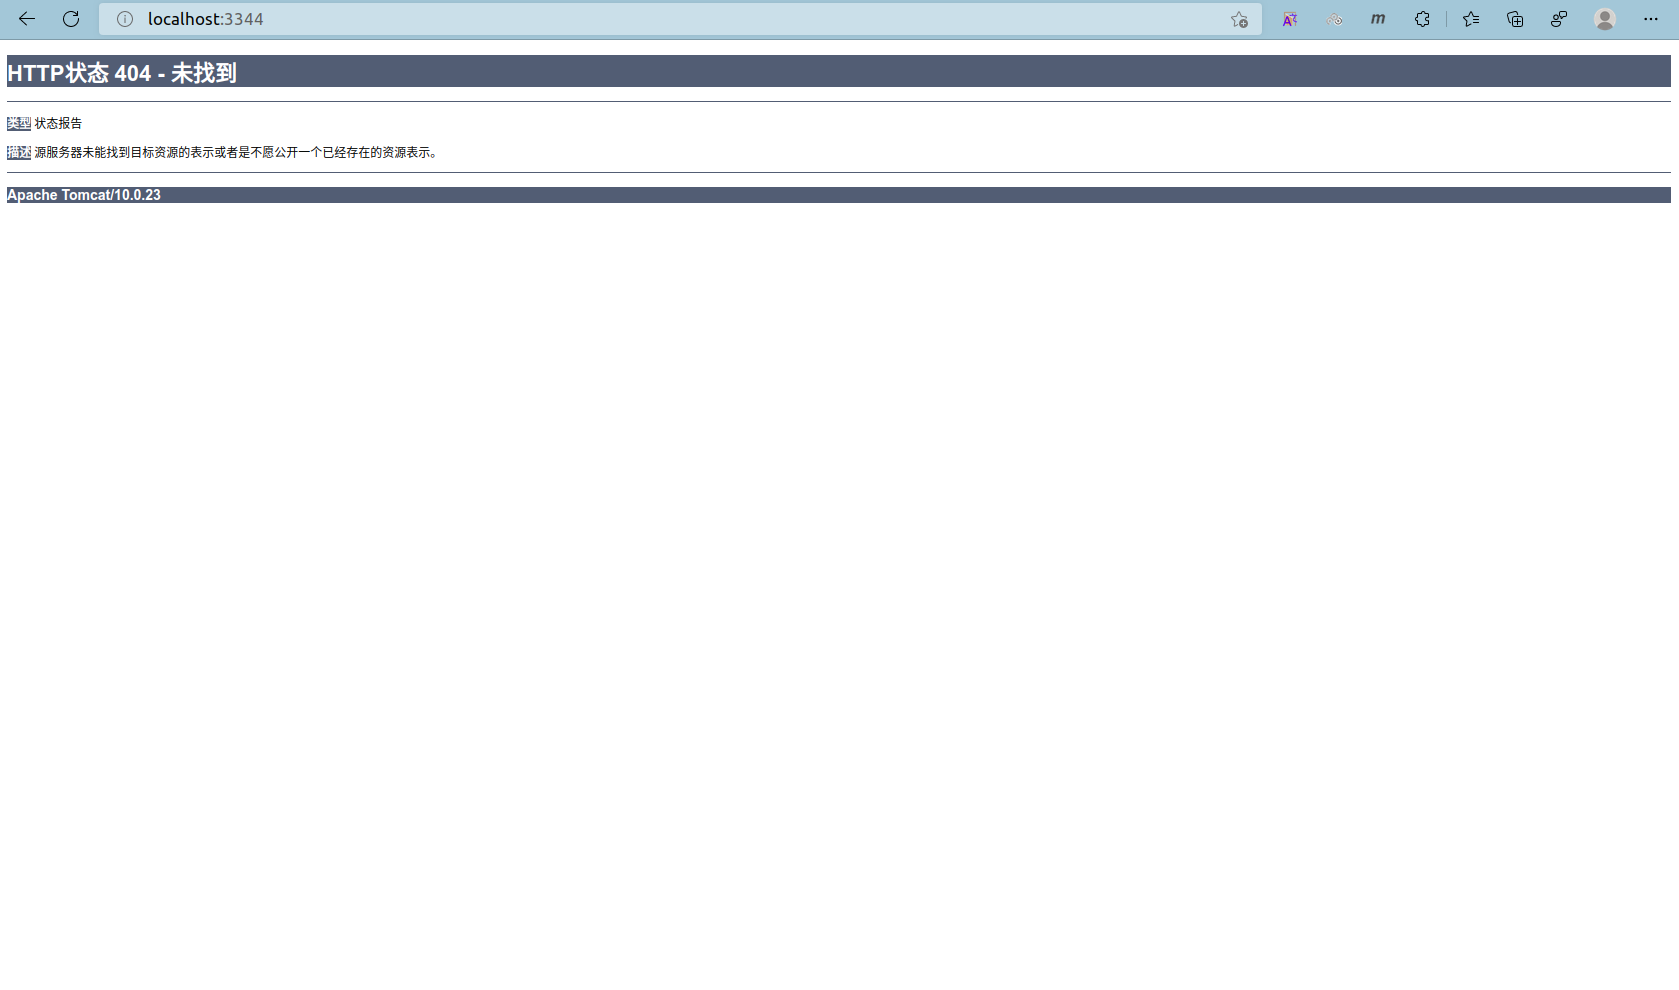
由于 /usr/local/tomcat/webapps/ 是空的,所以测试访问没有问题,但没有内容。
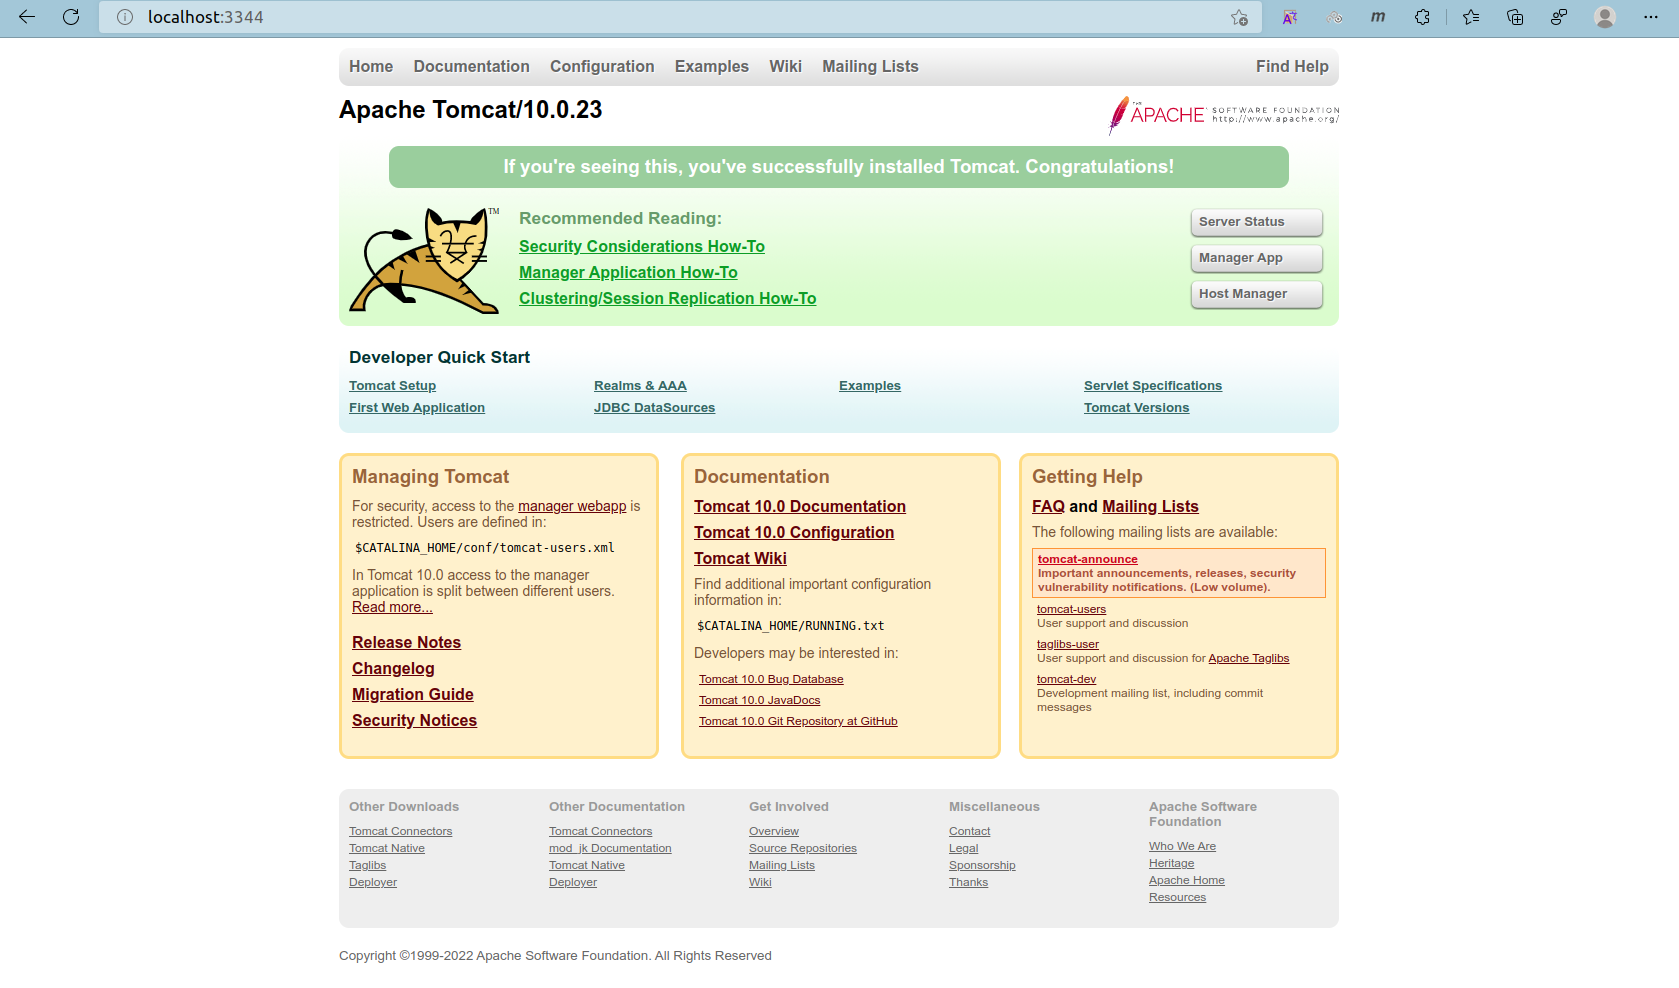
将 /usr/local/tomcat/webapps.dist/ 中的内容复制到 /usr/local/tomcat/webapps/ 中,测试访问结果如下图。

1 | (base) lyfubuntu@lyfubuntu:~/my_computer_language/docker$ docker images |

Docker 部署 elasticsearch
docker hub 中 elasticsearch 的主页:https://hub.docker.com/_/elasticsearch 。
How to use this image
Note: Pulling an images requires using a specific version number tag. The latest tag is not supported.
For Elasticsearch versions prior to 6.4.0 a full list of images, tags, and documentation can be found at docker.elastic.co.
For full Elasticsearch documentation see here.
The commands below are intended for deploying in a development context only. For production installation and configuration, see Install Elasticsearch with Docker.
Running in Development Mode
Create user defined network (useful for connecting to other services attached to the same network (e.g. Kibana)):
1 | docker network create somenetwork |
Run Elasticsearch:
1 | docker run -d --name elasticsearch --net somenetwork -p 9200:9200 -p 9300:9300 -e "discovery.type=single-node" elasticsearch:tag |
Running in Production Mode
See Install Elasticsearch with Docker
1 | es 暴露的端口很多 |
1 | (base) lyfubuntu@lyfubuntu:~/my_computer_language/docker$ docker images |
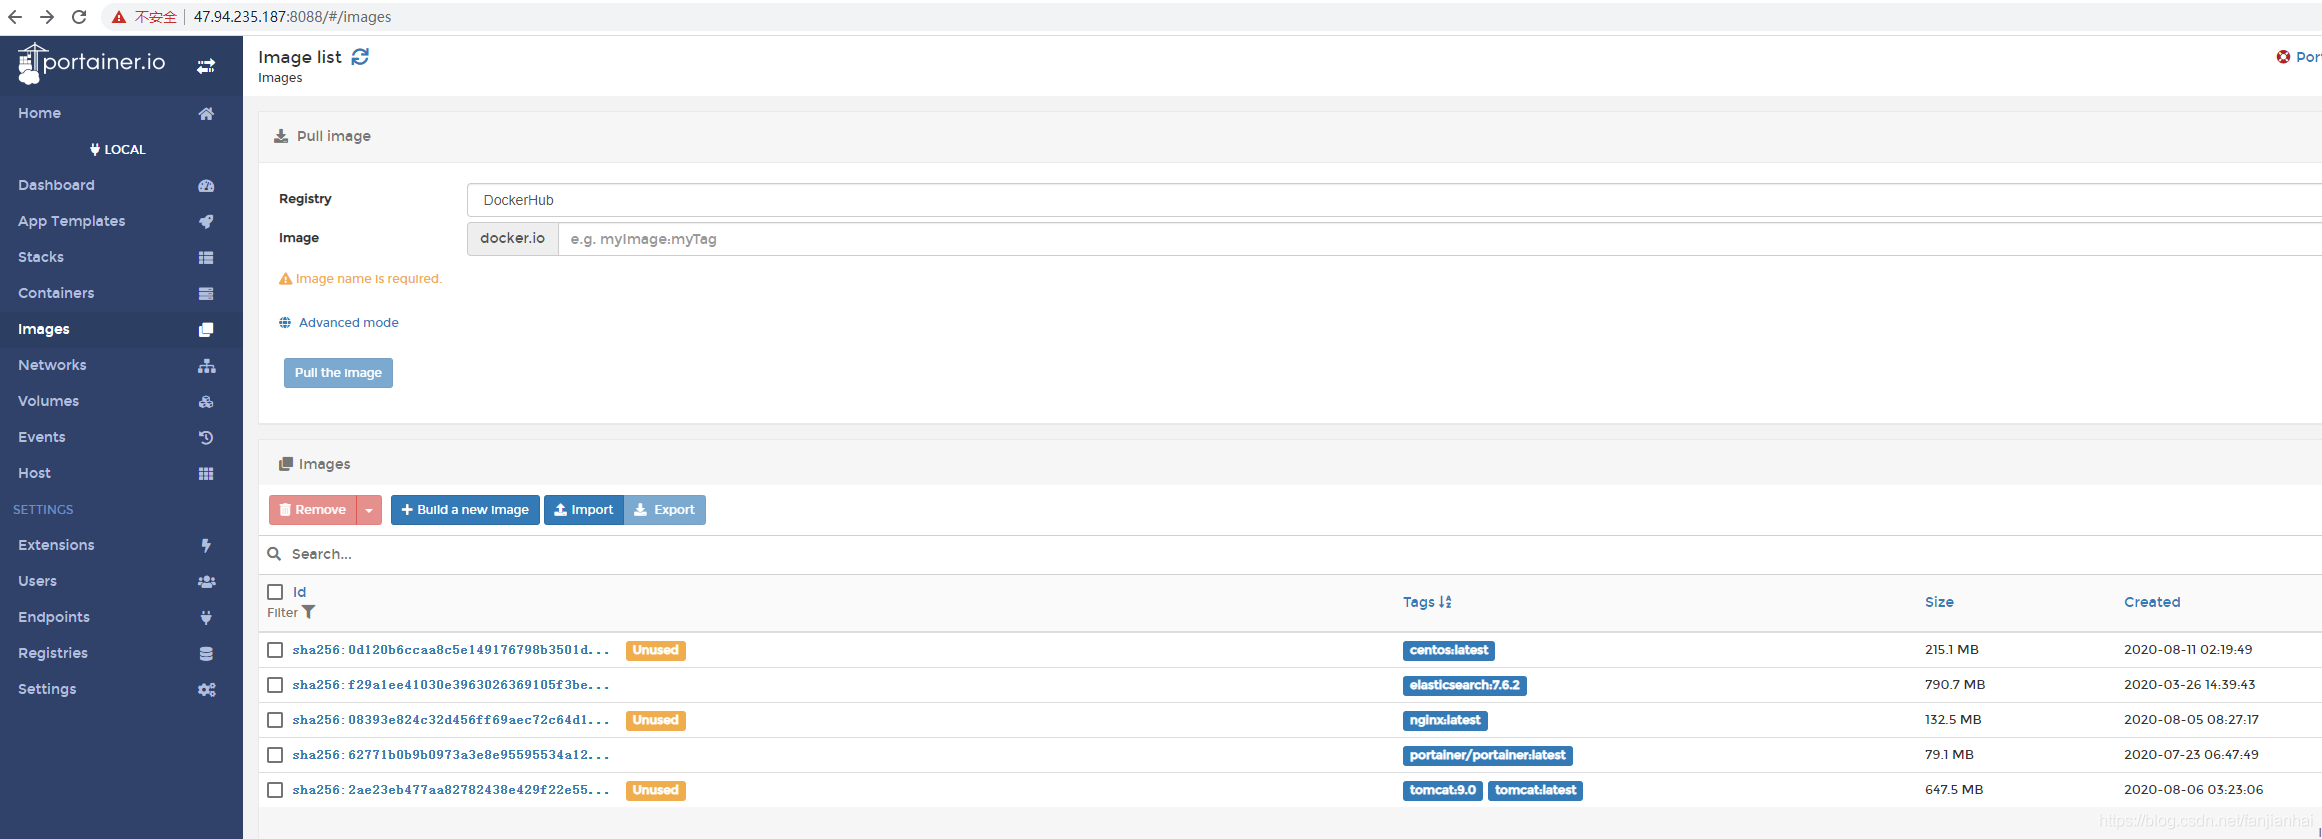
可视化
docker hub 中 portainer/portainer( This Repo is now deprecated, use portainer/portainer-ce instead. ) 的主页:https://hub.docker.com/r/portainer/portainer 。
docker hub 中 portainer/portainer-ce( Portainer CE - a lightweight service delivery platform for containerized applications ) 的主页:https://hub.docker.com/r/portainer/portainer-ce 。
1 | docker run -d -p 8088:9000 --restart=always -v /var/run/docker.sock:/var/run/docker.sock --privileged=true portainer/portainer |
Docker 原理
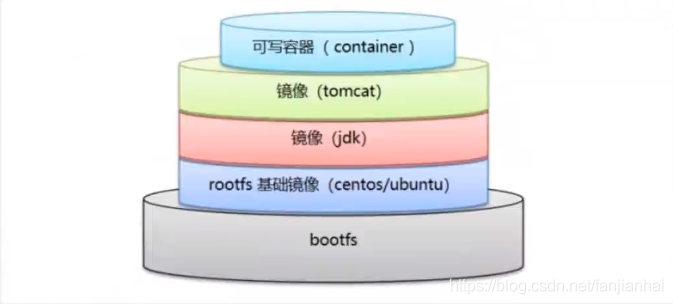
Docker 镜像都是只读的,当容器启动时,一个新的可写层被加载到镜像的顶部!这一层就是我们通常说的容器层,容器层之下的都叫做镜像层。

commit 镜像
1 | 提交容器成为一个新的镜像 |
实战测试
1 | 1. 启动一个默认的 tomcat |
1 | (base) lyfubuntu@lyfubuntu:~/my_computer_language/docker$ docker commit --help |
1 | (base) lyfubuntu@lyfubuntu:~/my_computer_language/docker$ docker images |

容器数据卷
准备
使用 docker commit 提交之前使用 yum -y install vim 安装 vim 的 centos 容器为新镜像: my_centos。
1 | (base) lyfubuntu@lyfubuntu:~/my_computer_language/docker$ docker images |
docker 的回顾
问题: 如果将应用和环境打包成一个镜像,那么容器被删除,容器中的数据就会丢失!
需求: 数据需要持久化。
MySQL: 容器删了 == 删库跑路,需求: MySQL 数据需要存储到本地!
容器数据卷: 数据共享技术,Docker 容器中产生的数据会同步到本地。
容器数据卷: 就是目录挂载 -> 将容器内目录挂载到宿主机目录上面!
总结: 容器数据卷 -> 数据持久化、同步( 宿主机和容器 )和共享( 容器间 )。
数据卷
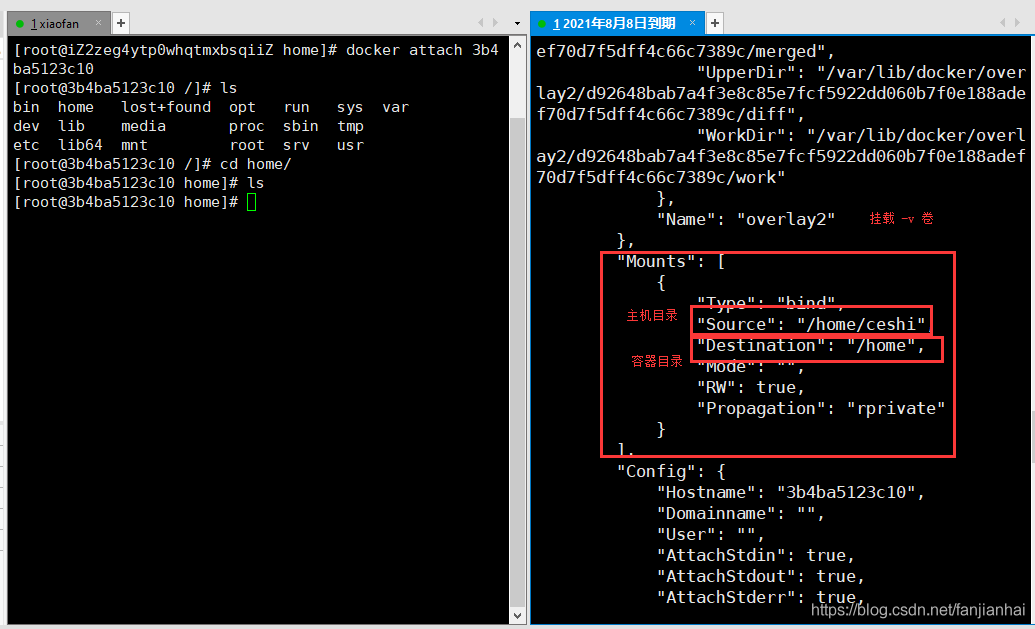
使用
docker run -v挂载目录
1 | docker run -it -v 主机目录:容器目录 |
1 | (base) lyfubuntu@lyfubuntu:~/my_computer_language/docker/my_centos$ ls |
1 | (base) lyfubuntu@lyfubuntu:~/my_computer_language/docker/my_centos$ docker images |
实战:安装 MySQL
准备
- 获得宿主机IP地址
1 | (base) lyfubuntu@lyfubuntu:~$ # 1. 安装 net-tools,之后可以使用 ifconfig 获得 IP 地址 |
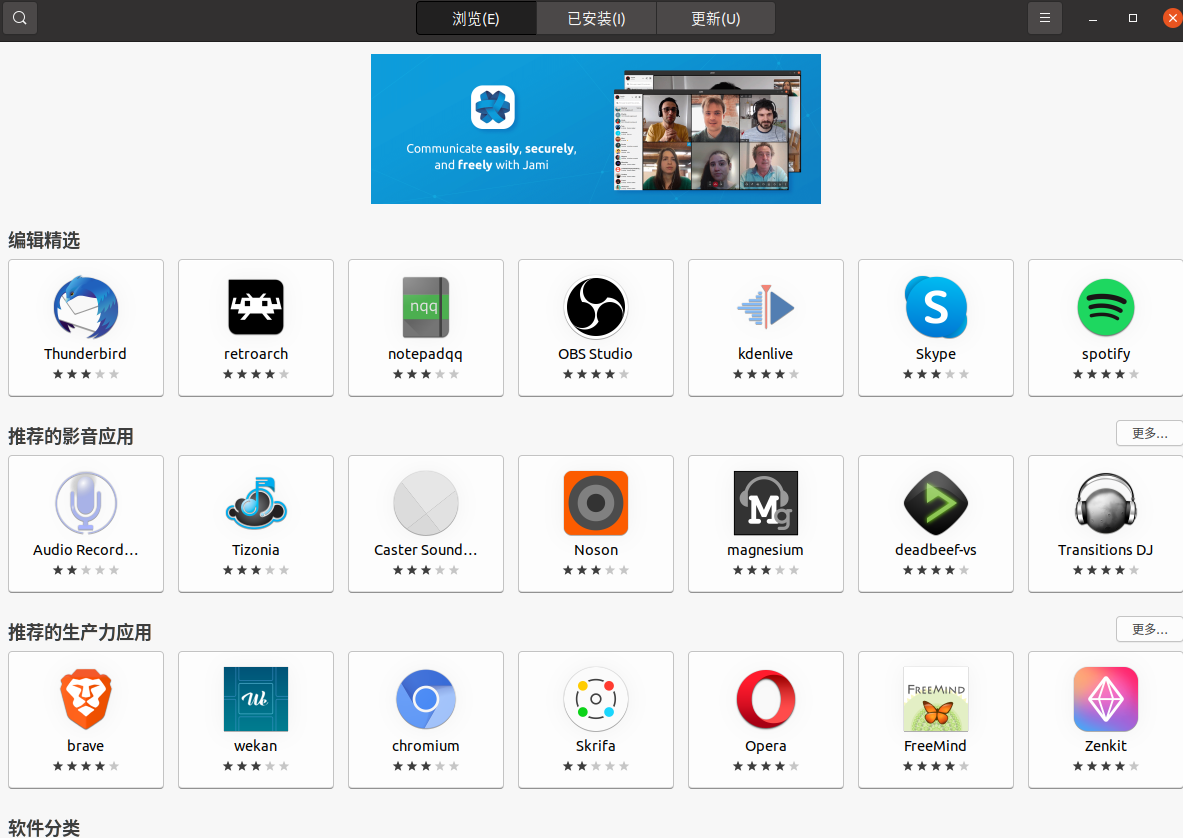
- 更换软件中心
1 | Ubuntu 20.04.4 LTS 默认软件中心 snap 经常打不开 |

-
MySQL图形化管理工具
-
MySQL Workbench是MySQL官方出品的一款客户端工具,免费,功能强大,可支持数据库建模和设计、查询开发和测试、服务器配置和监视、用户和安全管理、备份和恢复自动化、审计数据检查以及向导驱动的数据库迁移。 -
MySQL Workbench可以从该地址 MySQL Workbench 下载。 -
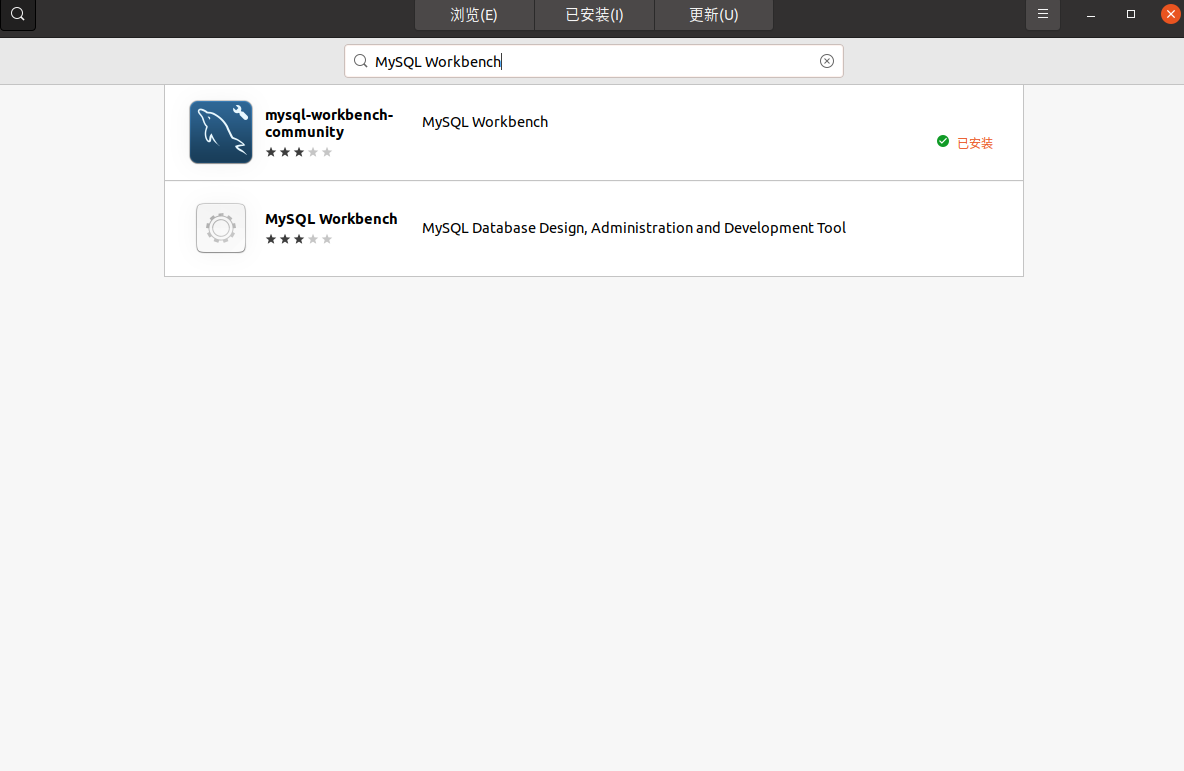
打开上面安装的软件中心,搜索
MySQL Workbench。安装mysql-workbench-community。
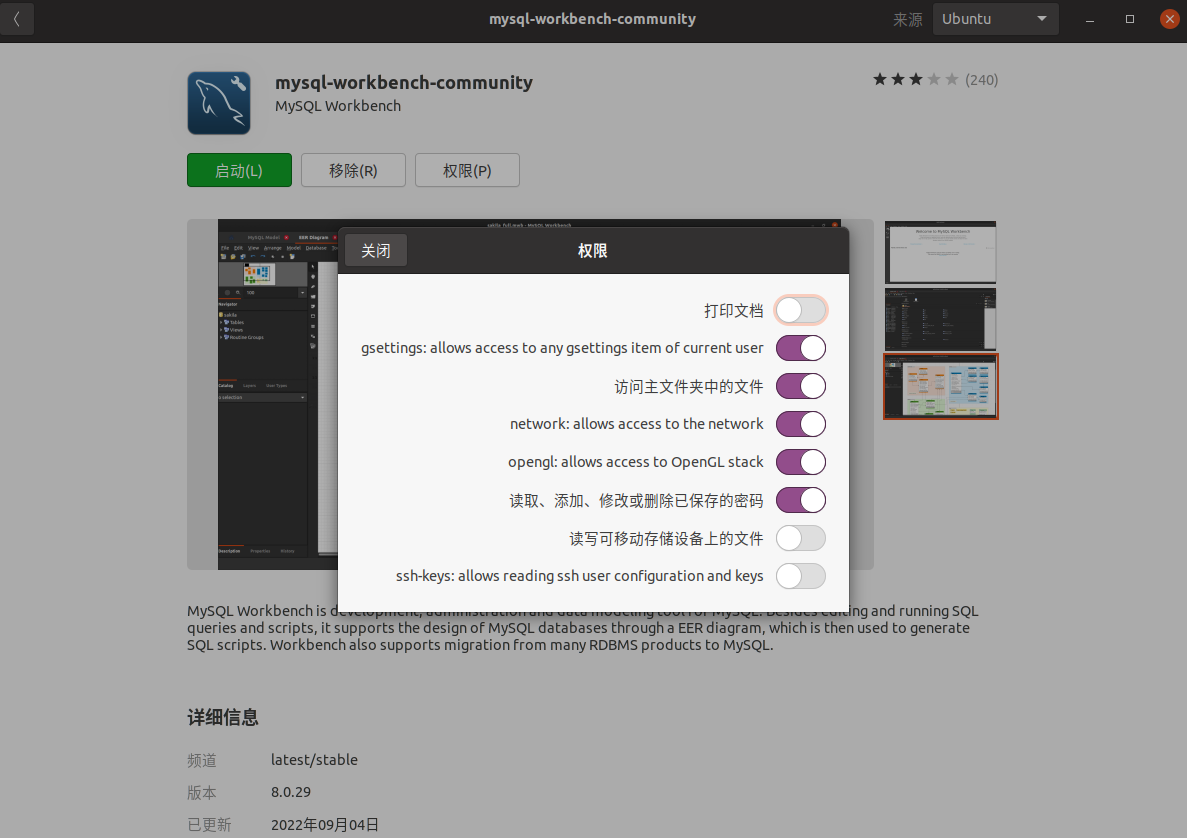
- 安装
mysql-workbench-community完成后,点击权限(P),打开读取、添加、修改或删除已保存的密码按钮。
-
安装 MySQL
docker hub 中 mysql 的主页:https://hub.docker.com/_/mysql 。
问题: MySQL 的数据持久化的问题!
1 | 获取镜像 |
1 | (base) lyfubuntu@lyfubuntu:~$ docker images |
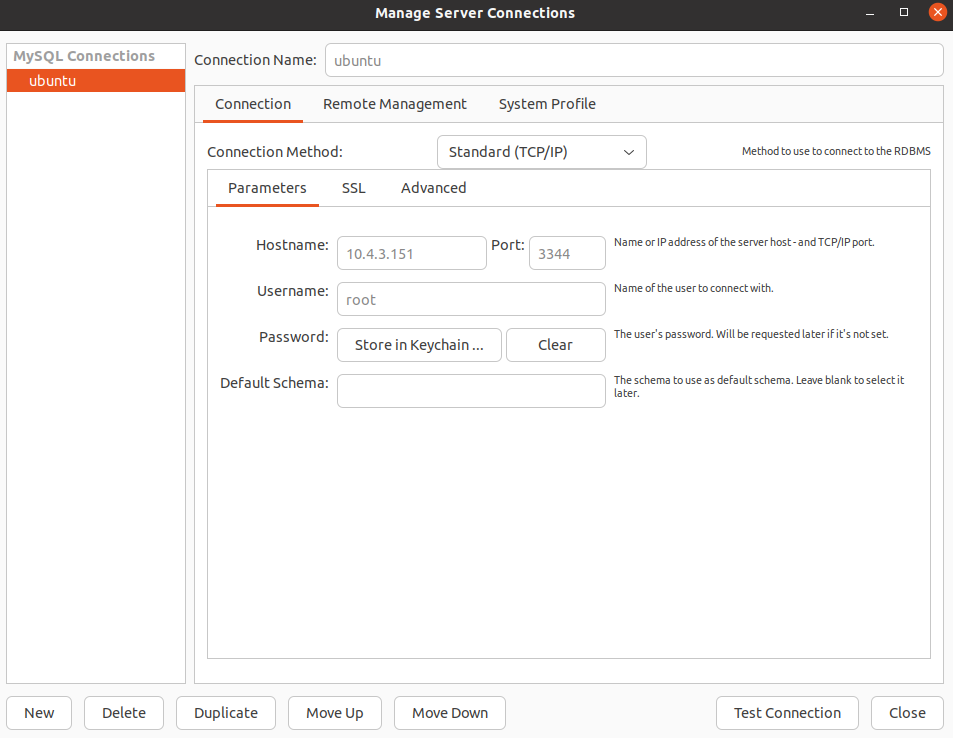
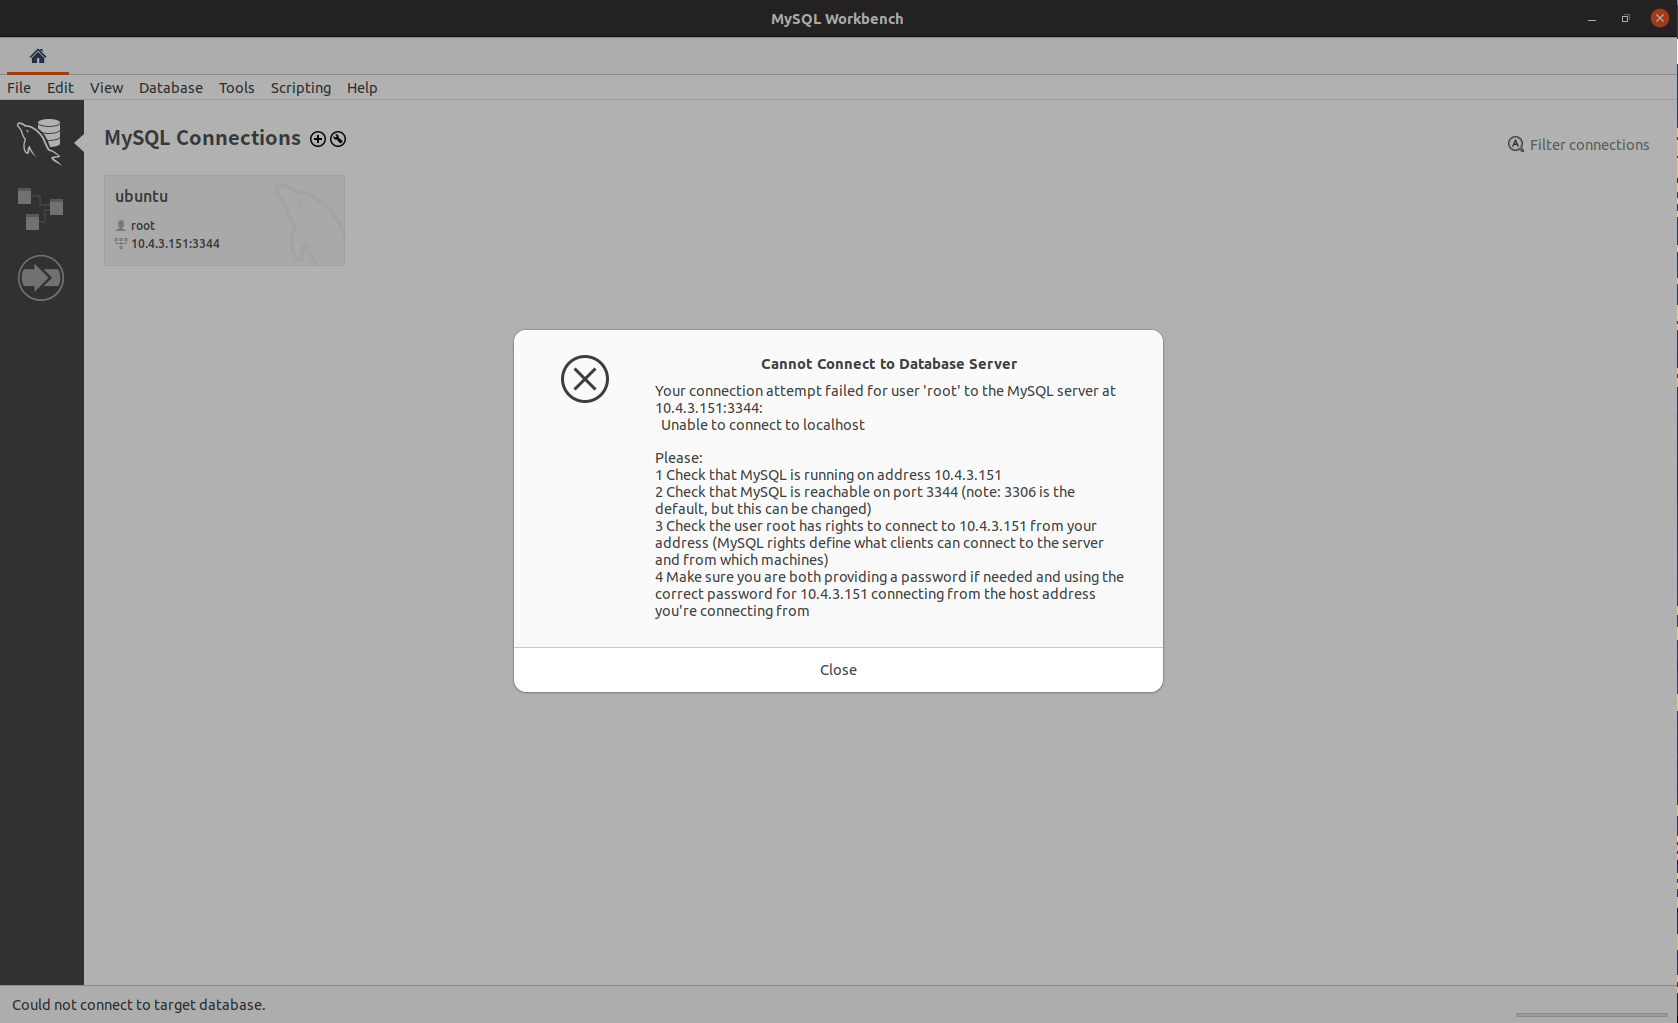
用 mysql-workbench-community 连接 MySQL ,如下图。
Hostname:10.4.3.151
Port:3344
Username:root
Password:123456
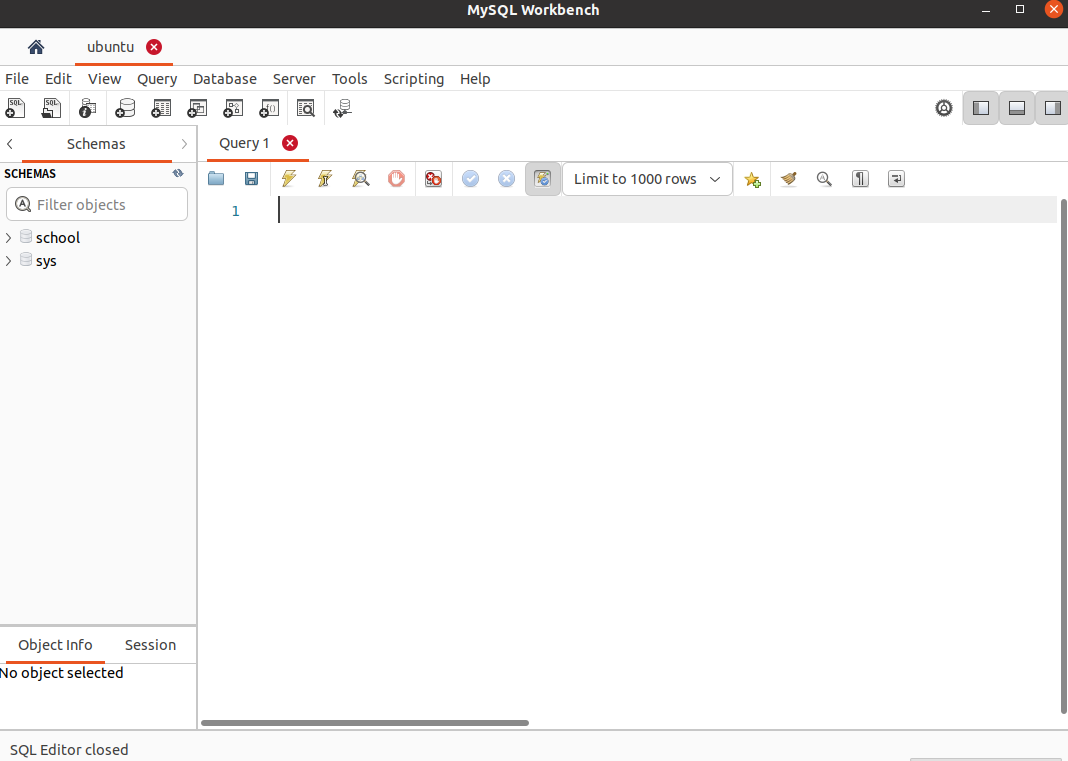
点击如下按钮创建 school 数据库。

1 | (base) lyfubuntu@lyfubuntu:~$ docker images |
匿名和具名挂载
1 | 匿名挂载 |
所有 docker 容器内的卷,没有指定目录的情况下都是在 /var/lib/docker/volumes/xxx/_data 中。
我们通过具名挂载可以方便的找到我们的一个卷,大多数情况下使用的是具名挂载。
1 | 如何确定是具名挂载还是匿名挂载,还是指定路径挂载! |
1 | (base) lyfubuntu@lyfubuntu:~$ cd my_computer_language/docker/ |
拓展
1 | -v 容器内容路径 |
Dockerfile
初始 Dockerfile
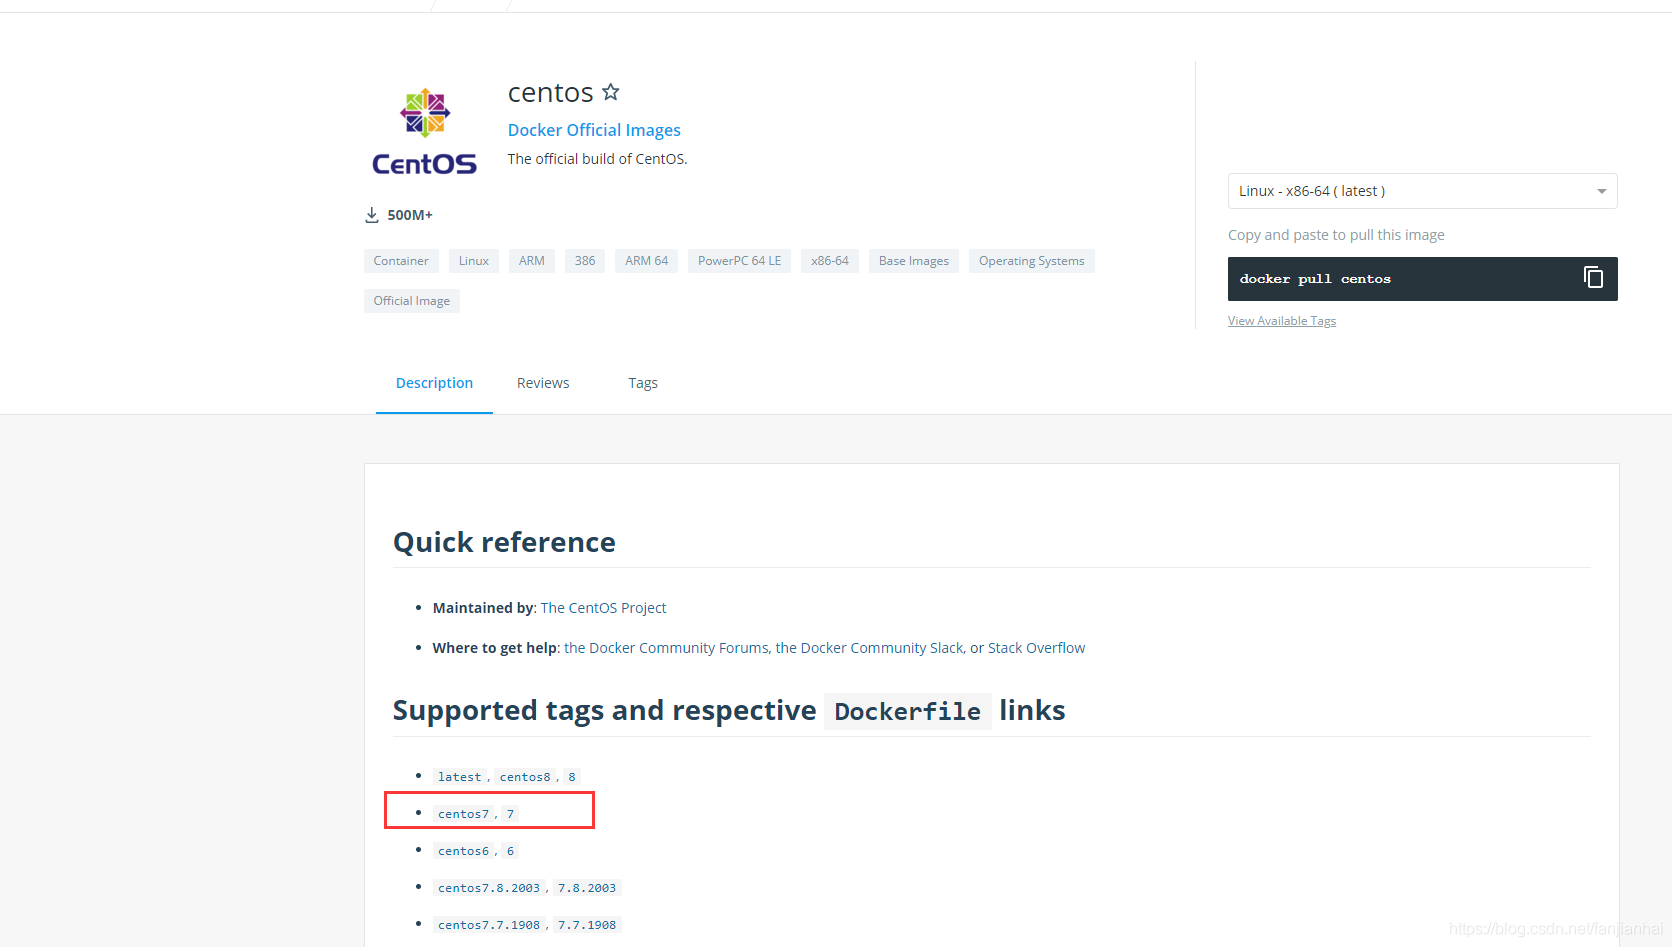
docker hub 中 centos 的主页:https://hub.docker.com/_/centos 。
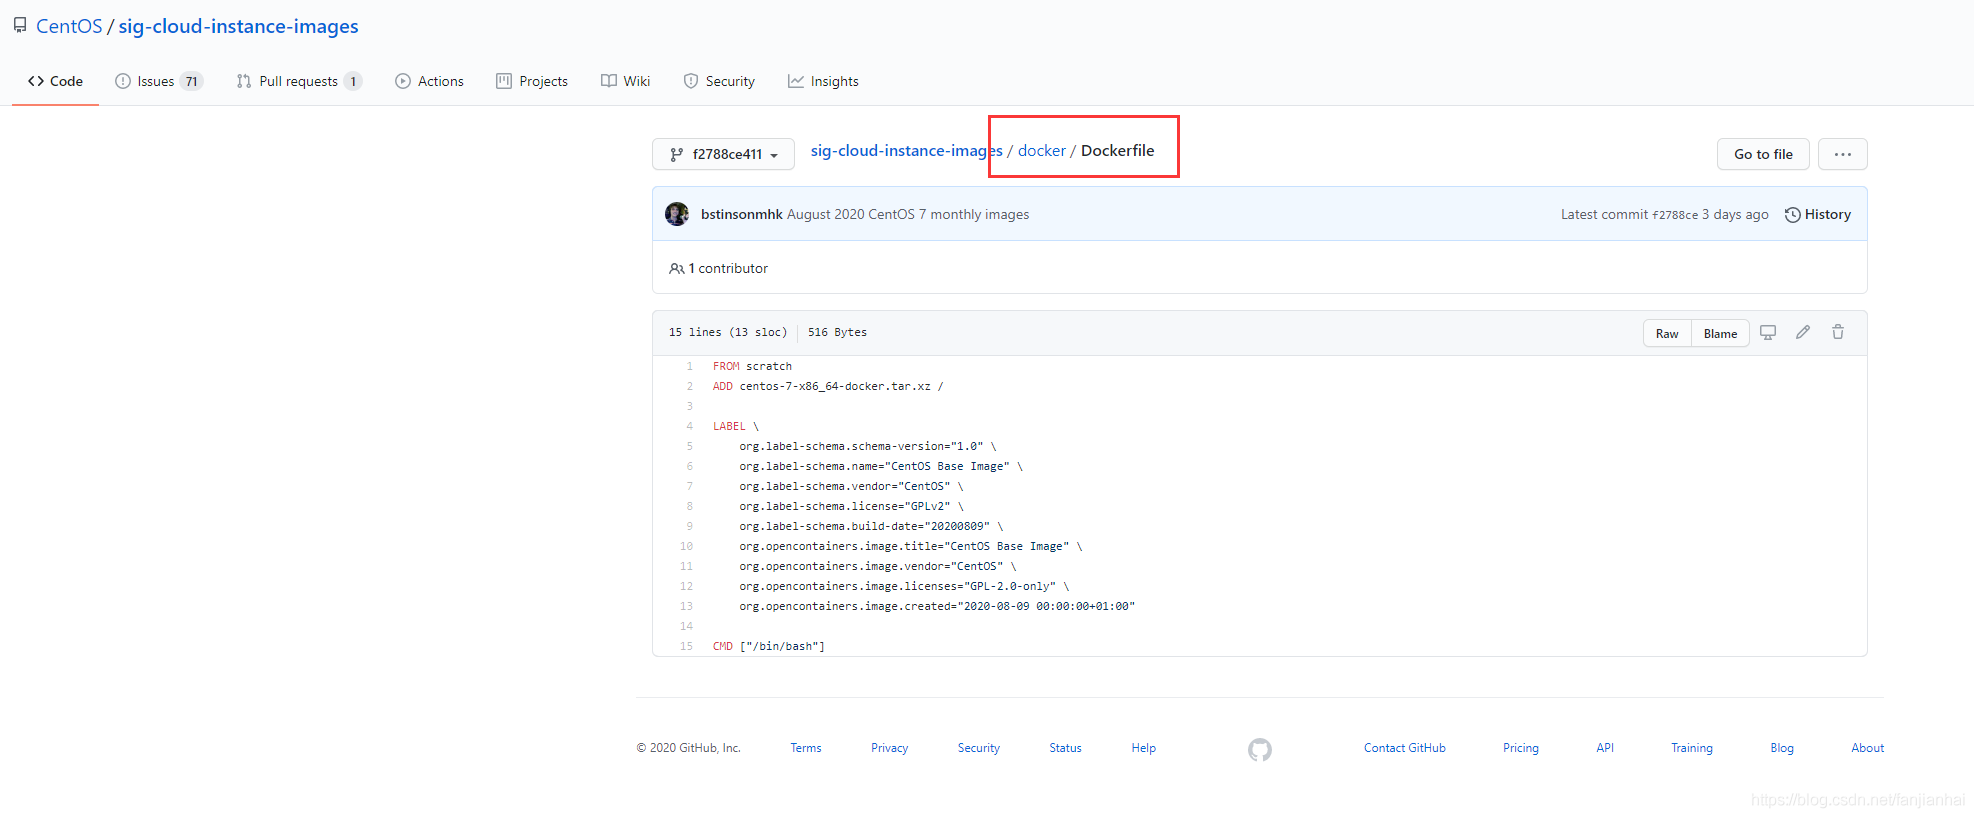
Supported tags and respective Dockerfile links
1 | FROM scratch |
Dockerfile: 用来构建 docker 镜像的构建文件!是一个命令脚本!
通过下面的脚本可以生成镜像,镜像是一层层的。脚本也是由一个个的命令组成的,每个命令都是镜像的一层。
1 | # 创建一个 Dockerfile 文件,名字任意 |
1 | (base) lyfubuntu@lyfubuntu:~$ cd my_computer_language/docker/ |
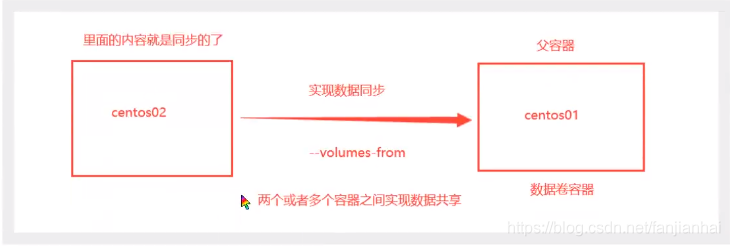
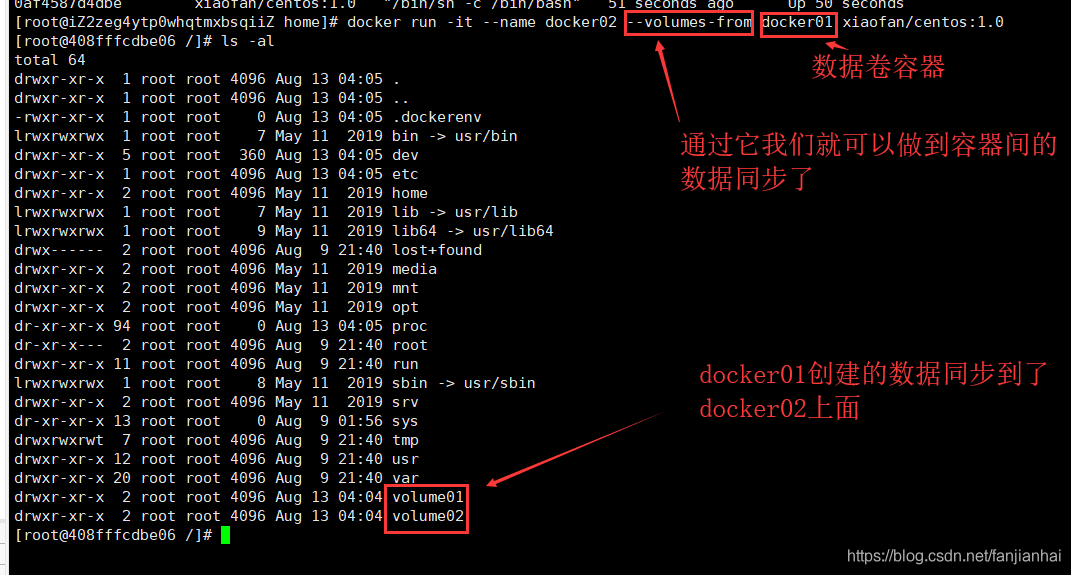
数据卷容器
多个
mysql同步数据!
启动
3个容器,启动我们刚才自己写的镜像

1 | (base) lyfubuntu@lyfubuntu:~/my_computer_language/docker/my_Dockerfile$ docker images |
多个 mysql 实现数据共享
1 | docker run -d -p 3344:3306 -v /etc/mysql/conf.d -v /var/lib/mysql -e MYSQL_ROOT_PASSWORD=123456 --name mysql01 mysql:5.7 |
结论
-
容器之间的配置信息可以通过数据卷容器传递。 -
数据卷容器的生命周期一直持续到没有容器使用为止。 -
一旦你持久化到了
本地,这个时候,本地的数据是不会删除的!
Dockerfile
dockerFile 是用来构建 docker 镜像的文件!命令参数脚本!
-
编写一个
dockerFile文件。 -
docker build使用dockerFile构建一个镜像。 -
docker run运行镜像。 -
docker push发布镜像(DockerHub、阿里云镜像)。
很多官方镜像都是基础包,很多功能都不具备,我们通常会自己搭建镜像!
官方既然可以制作镜像,我们一样可以!
Dockerfile 的构建过程
基础知识:
-
每个
保留关键字(指令)都必须是大写字母。 -
从上到下顺序执行。 -
#表示注释。 -
每个
指令都会创建一个新的镜像层。
Dockerfile是面向开发的,我们以后要发布项目->镜像-> 编写Dockerfile文件。
Docker镜像逐渐成为企业的交付标准,必须要掌握!
步骤:开发、部署、运维… 缺一不可!
Dockerfile: 构建文件,定义了一切的步骤(源代码)。
DockerImages: 通过Dockerfile构建生成的镜像,最终发布的产品!
DockerContainer: 容器就是镜像运行起来创建的服务器。
Dockerfile 指令说明
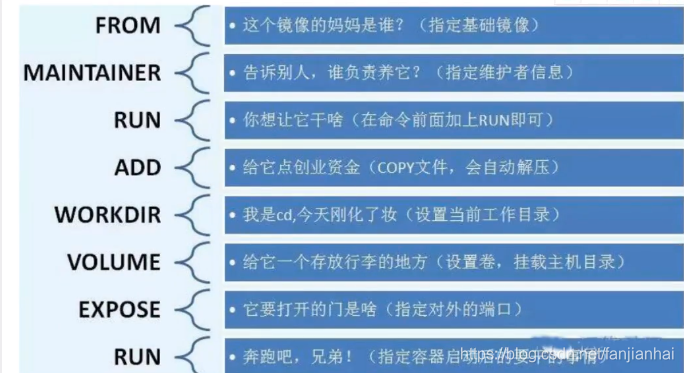
1 | FROM # 基础镜像,一切从这里开始构建 |
创建一个自己的 centos
1 | 1. 编写 Dockerfile |
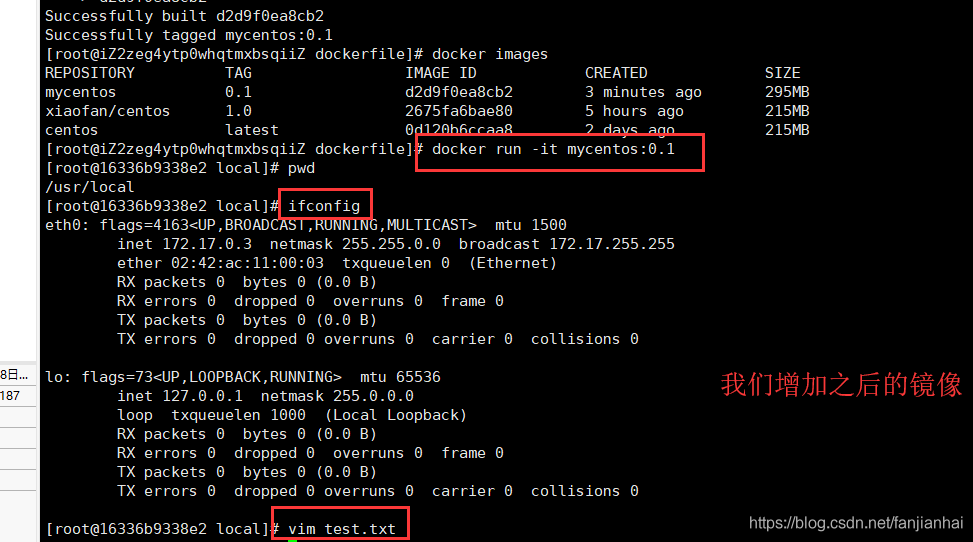
我们可以列出本地进行的变更历史。
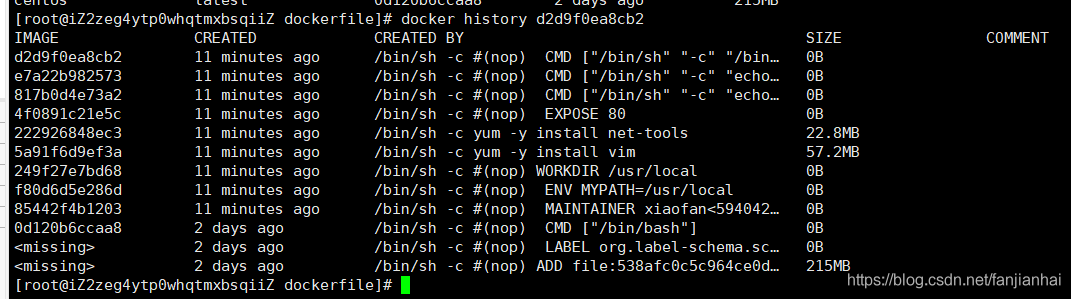
1 | (base) lyfubuntu@lyfubuntu:~/my_computer_language/docker/my_Dockerfile$ ls -al |
CMD 和 ENTRYPOINT 区别
1 | CMD # 指定这个容器启动的时候要运行的命令,只有最后一个会生效,可被替代 |
测试 CMD
1 | 1. 编写 dockerfile |
测试 ENTRYPOINT
1 | 1. 编写 dockerfile |
1 | (base) lyfubuntu@lyfubuntu:~/my_computer_language/docker/my_Dockerfile$ ls |
Dockerfile 制作 tomcat 镜像
Dockerfile 制作 tomcat 镜像
- 准备镜像文件:
tomcat压缩包和jdk压缩包。apache-tomcat-9.0.37.tar.gz可以从 https://archive.apache.org/dist/tomcat/tomcat-9/v9.0.37/bin/ 处下载。jdk-8u341-linux-x64.tar.gz可以从 https://www.oracle.com/java/technologies/downloads/ 处下载。
1 | (base) lyfubuntu@lyfubuntu:~/my_computer_language/docker/my_Dockerfile$ ll *.gz |
- 编写
Dockerfile文件。官方命名:Dockerfile,docker build会自动寻找这个文件,不需要-f指定。
1 | FROM centos:7 |
- 编写
readme.txt。
1 | readme.txt |
- 构建镜像。
1 | docker build -t diytomcat . |
- 创建
本地挂载目录:diytomcat。
1 | (base) lyfubuntu@lyfubuntu:~/my_computer_language/docker/my_Dockerfile$ cd .. |
- 启动镜像。
1 | docker run -d -p 3344:8080 --name luyanfengtomcat1 -v /home/lyfubuntu/my_computer_language/docker/diytomcat/test:/usr/local/apache-tomcat-9.0.37/webapps/test -v /home/lyfubuntu/my_computer_language/docker/diytomcat/tomcatlogs/:/usr/local/apache-tomcat-9.0.37/logs diytomcat |
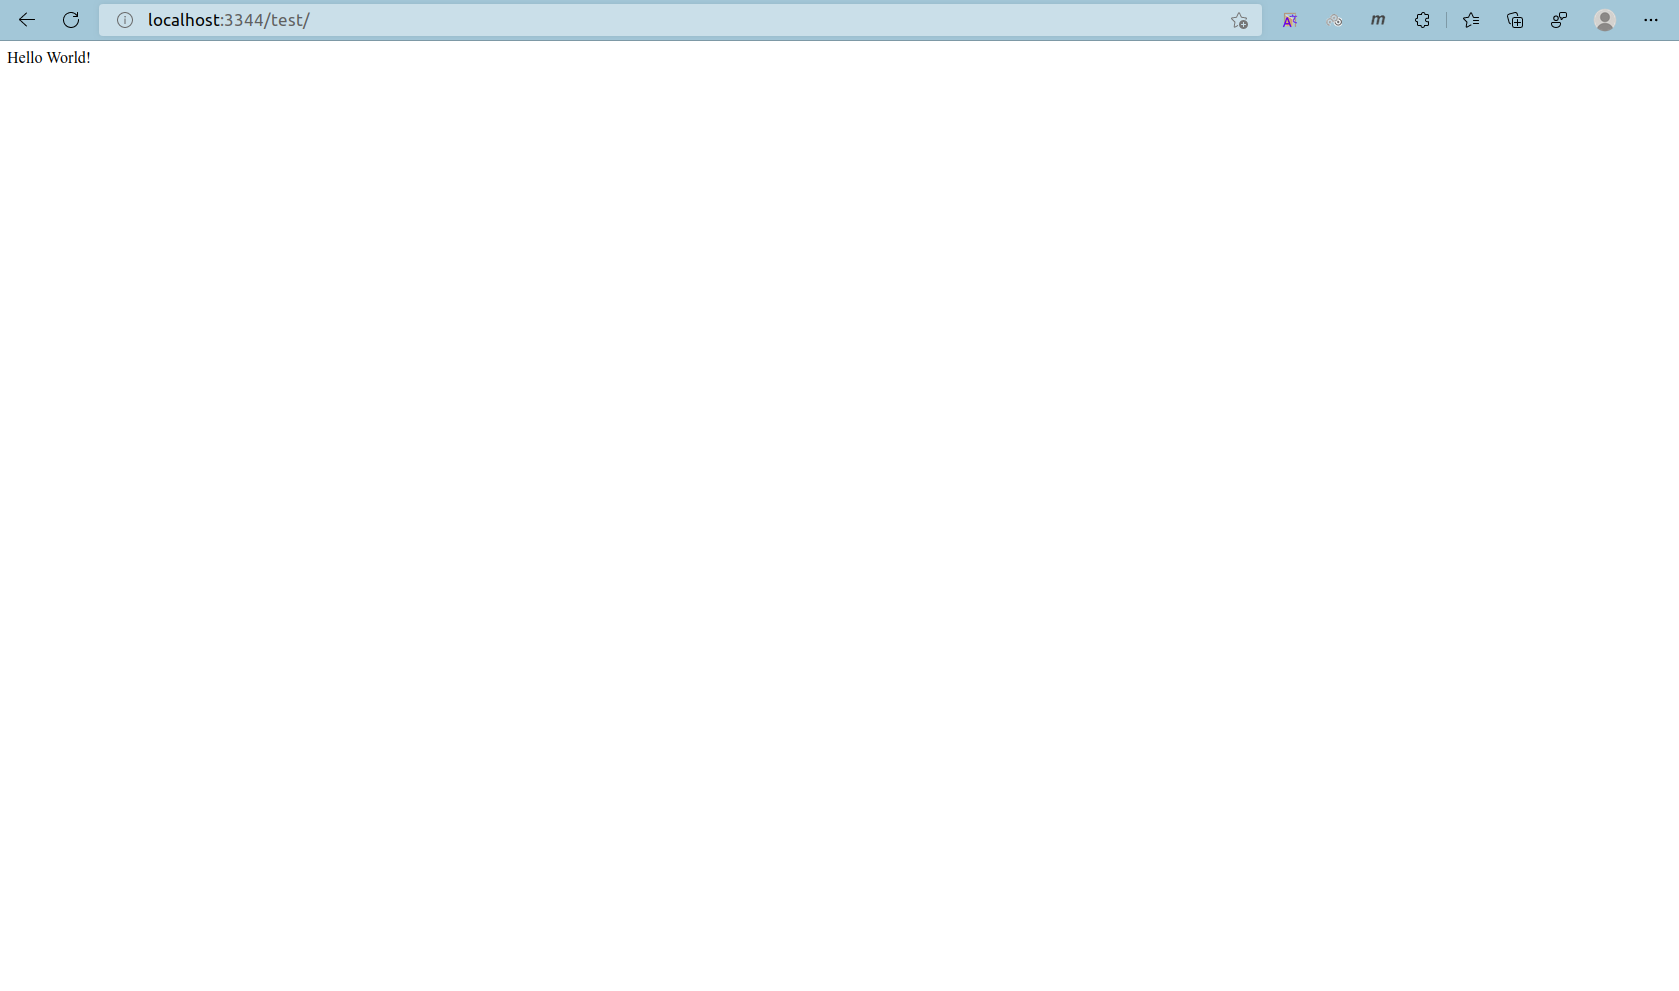
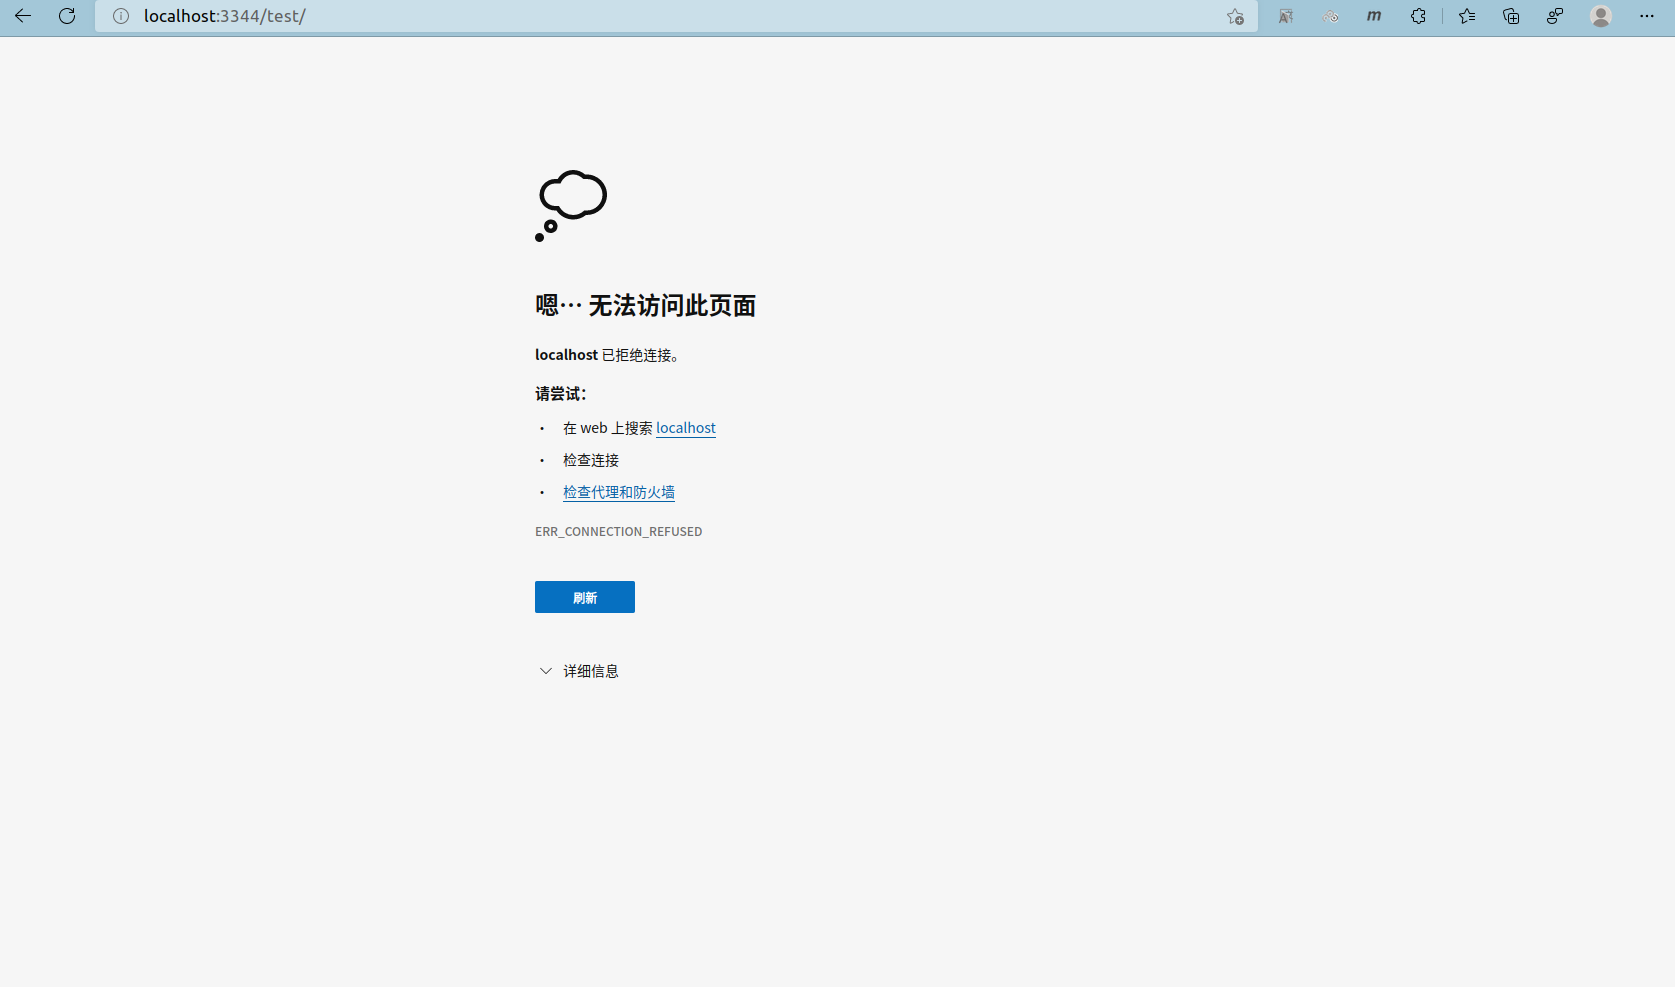
- 访问测试: http://localhost:3344/ 。

- 由于做了
卷挂载,因此在本地编写项目。编写web.xml和index.jsp文件。编写这些文件需要使用root用户操作。
diytomcat/test/index.jsp
1 | <%@ page language="java" contentType="text/html; charset=UTF-8" |
diytomcat/test/WEB-INF/web.xml
1 |
|
1 | (base) lyfubuntu@lyfubuntu:~/my_computer_language/docker/my_Dockerfile$ ls |
1 | (base) lyfubuntu@lyfubuntu:~/my_computer_language/docker$ ls |

发布自己的镜像到 Docker Hub
注册登录Docker Hub: https://hub.docker.com/ 。
- 登录
Docker Hub。
1 | docker login -u luyanfeng123 |
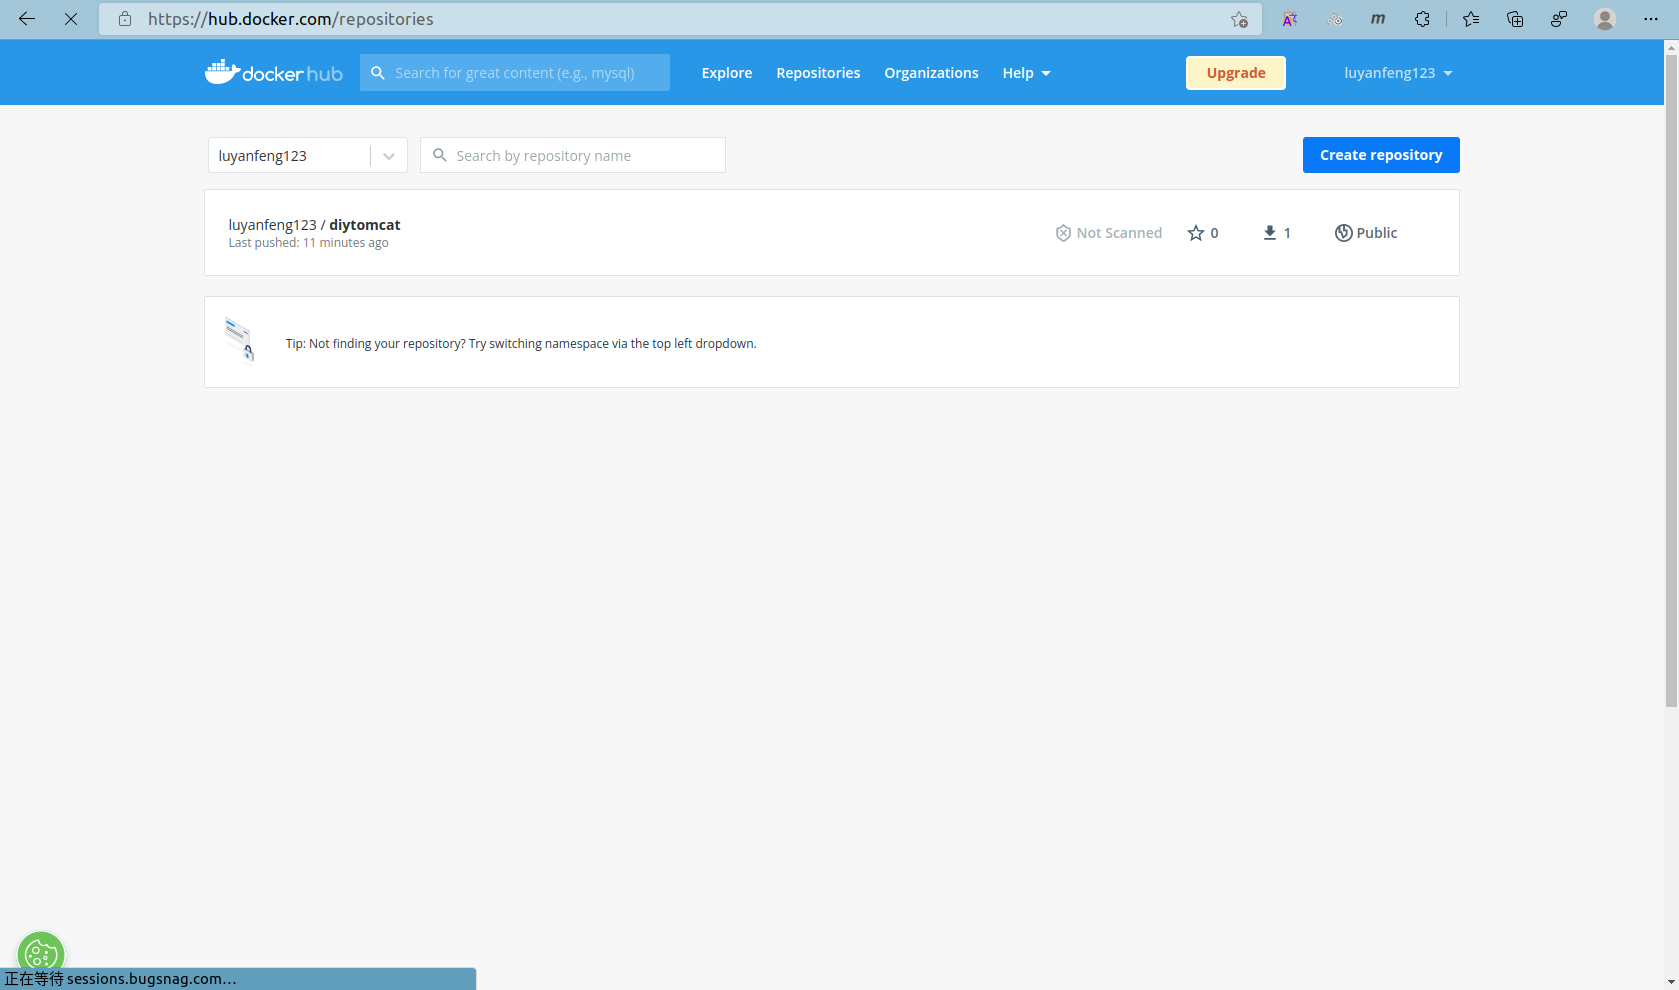
- 将我们的镜像提交到
Docker Hub上。
1 | (base) lyfubuntu@lyfubuntu:~/my_computer_language/docker$ docker images |
注意:提交到
Docker Hub上的镜像的前缀一定要是你的Docker Hub账号名(docker push luyanfeng123/diytomcat:1.0)。镜像的TAG可以通过docker tag修改。

1 | (base) lyfubuntu@lyfubuntu:~/my_computer_language/docker$ docker login --help |
总结
Docker 网络
连接 Docker0
1 | ip addr |
由于 docker hub 官网的基础镜像 tomcat 只包含简单的操作系统,相当于裸机状态,需要手动安装需要的命令。所以我们需要手动构建镜像。
1 | FROM tomcat |
1 | (base) lyfubuntu@lyfubuntu:~/my_computer_language/docker/tomcat_ip_ping$ ls |
问题: docker 是如何处理容器网络访问的?
1 | (base) lyfubuntu@lyfubuntu:~/my_computer_language/docker/tomcat_ip_ping$ docker run -d -P --name tomcat_ip_ping01 tomcat_ip_ping |
我们每启动一个 docker 容器,docker 就会给 docker 容器分配一个 IP 地址。我们只要安装了 docker,就会有一个 docker0 网卡,该网卡使用的技术是 veth-pair 技术!
再次运行 ip addr 。
1 | (base) lyfubuntu@lyfubuntu:~/my_computer_language/docker/tomcat_ip_ping$ # 每启动一个 docker 容器,docker 会分配给 docker 容器一个 ip 地址,我们只要安装了 docker,就会有一个网卡 docker0 桥接模式,使用的技术是 veth-pair 技术! |
再次启动一个容器,运行 ip addr,发现又多了一对网卡。
1 | (base) lyfubuntu@lyfubuntu:~/my_computer_language/docker/tomcat_ip_ping$ # 再启动一个容器,发现又多了一对网卡 |
我们发现容器的网卡,都是一对对的。
veth-pair是一对虚拟设备接口,都是成对出现的,一端连着协议,一端彼此相连。
veth-pair充当一个桥梁,连接着各种虚拟网络设备
OpenStac、Docker 容器之间的连接和OVS 的连接,都是使用veth-pair技术。
tomcat_ip_ping01 和 tomcat_ip_ping01 之间可以 ping 通!
1 | (base) lyfubuntu@lyfubuntu:~/my_computer_language/docker/tomcat_ip_ping$ # 我们发现容器带来网卡,都是一对对的 |
结论: 容器与容器之间是可以相互 ping 通的!
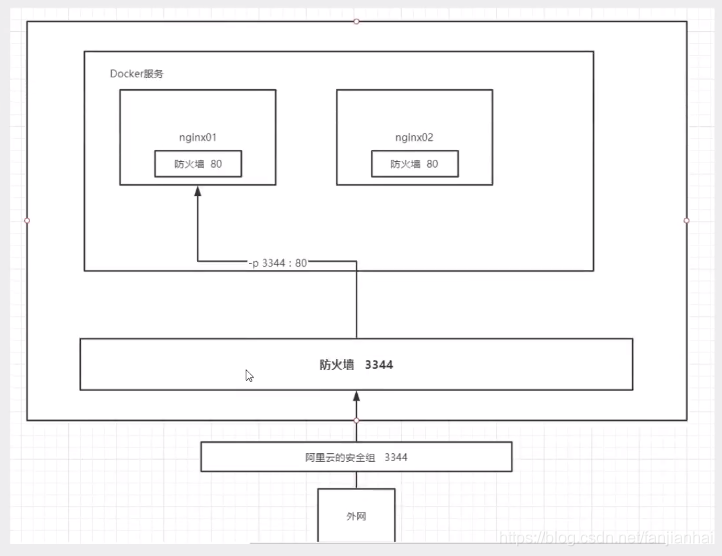
绘制一个网络模型图
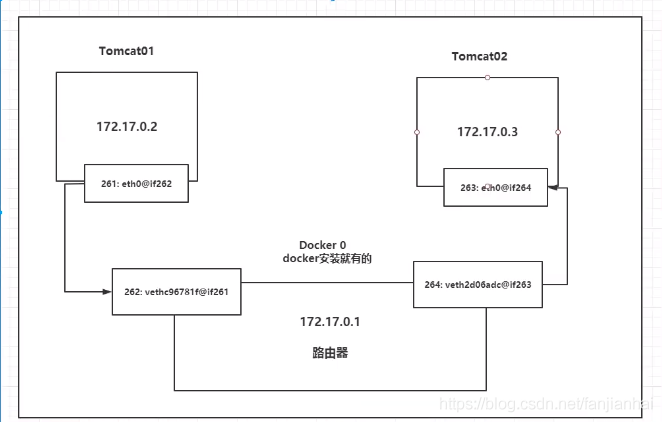
结论: tomcat01 和 tomcat02 共用一个路由器: docker0。
所有容器在不指定网络的情况下,都是使用 docker0 路由的。docker 会给我们的容器分配一个默认的可用 IP 地址。
docker 使用的是 linux 的桥接,宿主机有一个 docker 容器的网桥 docker0。
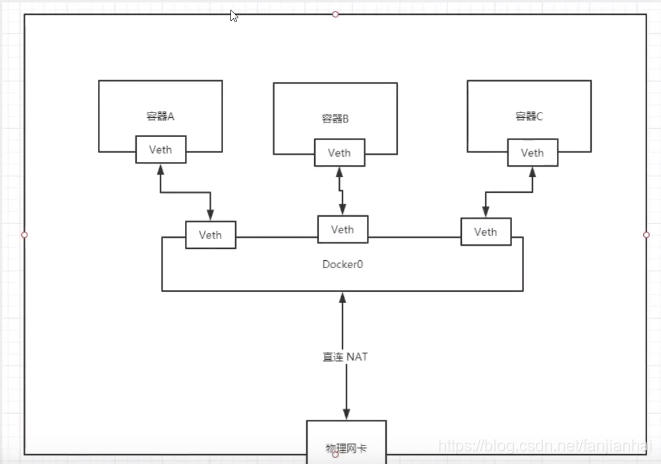
docker 中所有的网络接口都是虚拟的,虚拟的转化效率高!( 内网传递文件 )
只要容器删除,对应的网桥也被删除。
1 | (base) lyfubuntu@lyfubuntu:~/my_computer_language/docker/tomcat_ip_ping$ # 结论: 容器与容器之间是可以相互 ping 通的 |
1 | (base) lyfubuntu@lyfubuntu:~/my_computer_language/docker$ ip addr |
link
问题: 有一个微服务,database url = ip;ip更换了。我们希望可以按照名字进行访问容器。
1 | (base) lyfubuntu@lyfubuntu:~/my_computer_language/docker/tomcat_ip_ping$ docker exec -it tomcat_ip_ping02 ping tomcat_ip_ping01 |
1 | (base) lyfubuntu@lyfubuntu:~/my_computer_language/docker/tomcat_ip_ping$ docker network ls |
--link -> tomcat_ip_ping03 本地配置了 tomcat_ip_ping02 。
1 | docker exec -it tomcat_ip_ping03 cat /etc/hosts |
本质探究: --link 在 host 配置中增加了一个 172.17.0.3 tomcat_ip_ping02 027b83bd07b4
docker 不建议使用 --link 。也不建议使用 docker0,因为 docker0 不支持容器名连接访问。建议使用自定义网络。
1 | (base) lyfubuntu@lyfubuntu:~/my_computer_language/docker/tomcat_ip_ping$ docker images |
1 | (base) lyfubuntu@lyfubuntu:~/my_computer_language/docker/tomcat_ip_ping$ docker images |
自定义网络
查看所有 docker 网络
1 | # 查看所有 docker 网络 |
网络模式
-
bridge: 桥接模式,docker默认使用桥接模式,自己创建的网络也是使用bridge模式。 -
none: 不配置网络。 -
host: 和宿主机共享网络。 -
container: 容器网络连通!( 用的少,局限很大 )
测试
1 | (base) lyfubuntu@lyfubuntu:~$ # 网络模式 |
在自己创建的网络里面启动两个容器。
1 | (base) lyfubuntu@lyfubuntu:~$ docker run -d -P --name tomcat-net-01 --net mynet tomcat_ip_ping |
docker 自定义网络已经维护了对应的关系,使用自定义网络的好处:
-
redis- 不同的集群使用不同的网络,保证集群是安全和健康的。 -
mysql- 不同的集群使用不同的网络,保证集群是安全和健康的。
1 | (base) lyfubuntu@lyfubuntu:~$ docker images |
1 | (base) lyfubuntu@lyfubuntu:~$ docker images |
网络连通
打通 tomcat01 和 mynet。

1 | (base) lyfubuntu@lyfubuntu:~$ docker images |
1 | (base) lyfubuntu@lyfubuntu:~$ docker network ls |
实战:部署 redis
docker hub 中 redis 的主页:https://hub.docker.com/_/redis 。
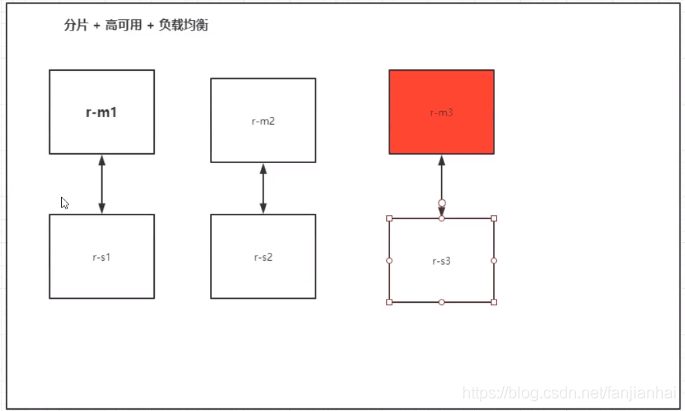
1 | 创建网卡 |
1 | (base) lyfubuntu@lyfubuntu:~$ cd my_computer_language/docker/ |
1 | (base) lyfubuntu@lyfubuntu:~/my_computer_language/docker$ docker images |
结语
第二十七篇博文写完,开心!!!!
今天,也是充满希望的一天。
 wechat
 alipay


.png)